When I first remodeled this bathroom, I replaced the flooring, the backsplash and the mirror. I updated the countertop, retiled the shower and all the trim. I changed the plumbing so I could install this beautiful wall-mounted faucet. I repainted. Twice. Believe it or not the picture below is my second paint job. That we lived with for over 6 months. I had seen so many bathrooms that looked so chic with black walls–and clearly fell short of the mark. Turns out you need sunlight to pull off a black room, go figure. I digress.
In all that remodeling, it didn’t even cross my mind to change the vanity! It was one of those things that you’re just blind to. I accepted it as it was. It seemed like a decent wood tone, and the handles could be called vintage kitsch. Compared to the rest of the problems, this seemed incredibly minor. Until it didn’t.

One day I looked at the vanity and wondered just how bad it actually was. And just that act of considering it almost immediately brought me complete revulsion. Those cabinets are orange! The bevel is dated! the knobs are horrible! I’m exaggerating a bit, but…well, look above! As I’ve mentioned before, we are renting. And while I have landlords who are more than happy for me to renovate as I please, they are selective about the projects they will pay for. As this would be coming out of my own pocket, I wanted to do it as inexpensively as possible.
Somewhere along the line I got the idea to turn the cabinet faces around so the flat front would be facing forward. This would give me the more modern look that I preferred, and had the perk of being FREE. I pried off all the drawer faces and sanded and stripped them. I tried to make it work, but in the end the wood was too damaged from the process of removing the faces to use. And I was so bummed. Plan B.

A quick trick to Home Depot and I found a beautiful birch veneer plywood. The magic: there was only one sheet left that had some damage on the back, so I asked for a discount, and I got a $57 sheet of plywood for only $17!!! And it would be enough to complete the guest bathroom too, which would mean that it was only $8.50 per room! I had the good folk at Home Depot rip my 4ft x 8ft sheet in half so it would fit in my van and it had the benefit of separating the wood for each bathroom.
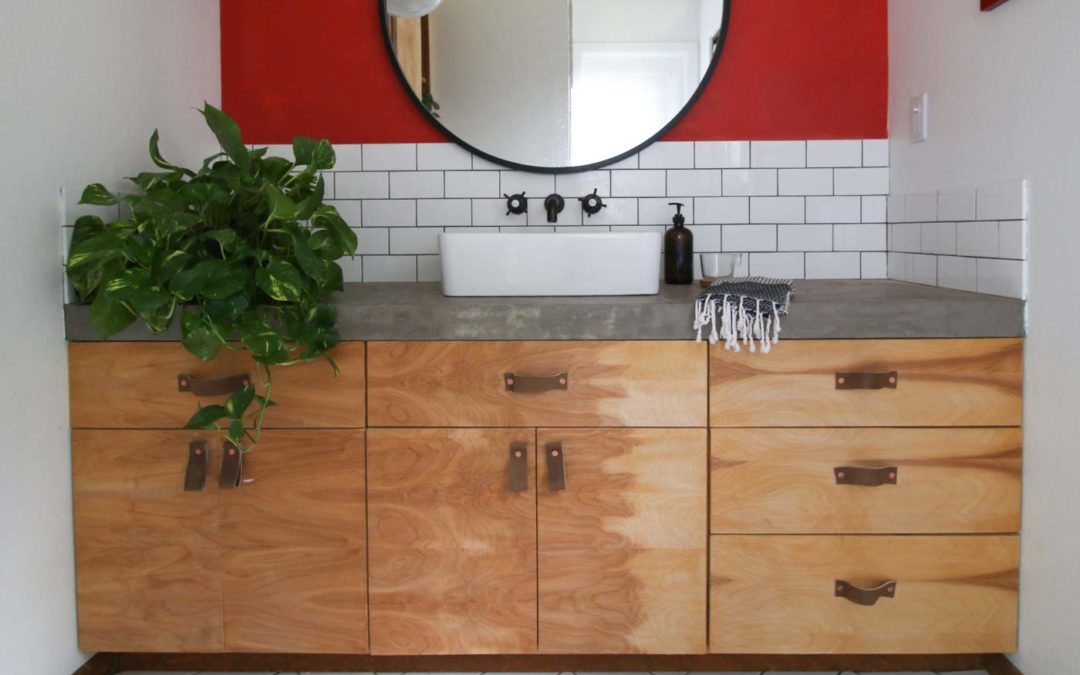
I took my long piece, penciled out the measurements of the different cabinet doors and using my circular saw I cut them all out! I used a pneumatic staple gun to attach the drawer fronts to the drawers themselves. I wanted recessed hinges, which meant I needed access to a drill press to carve out holes for the hinges to sit inside of. I have a lovely friend who is 86 years old and a wood worker. I took my cabinet doors to him and he worked his magic for me.

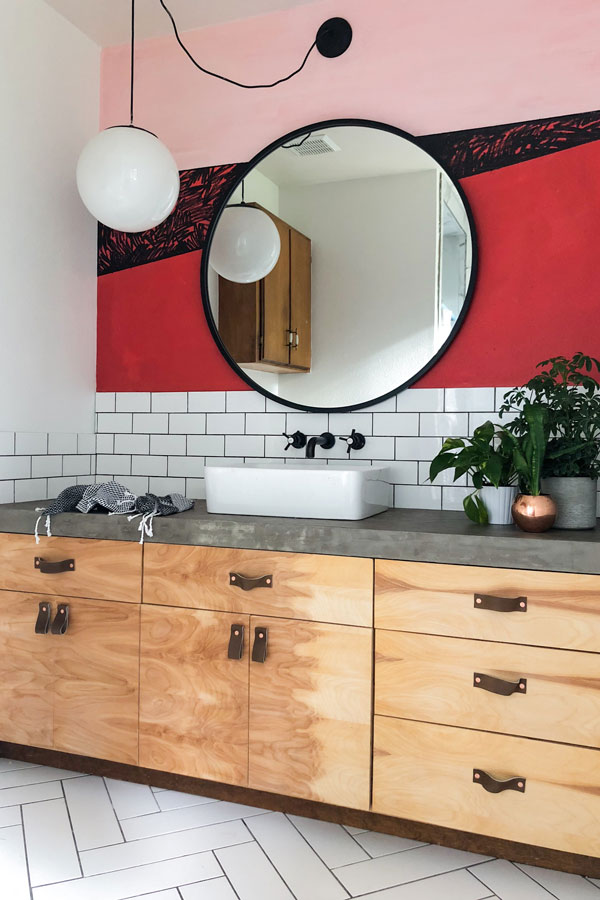
I finished these cabinets with boiled linseed oil. You can see in the above photo the portion that has been oiled compared to the other parts that are still raw.

With the modern lines of the new cabinets, we needed a new mirror, and I thought something round would balance all the angles. I chose this one from Umbra.
A fresh coat of paint, some leather pulls and a new light fixture and this bathroom is done!