
This post was sponsored by Sherwin Williams. All thoughts and opinions are my own.
Do you ever just look at something and see it with fresh eyes? That happened to me and our house. We’ve been remodeling this house for years. When you live in a house you are remodeling, you always have to wear futuristic glasses that let you continually see the potential and the plan—not what’s in front of you.
That is the endless optimism of being a DIYer.
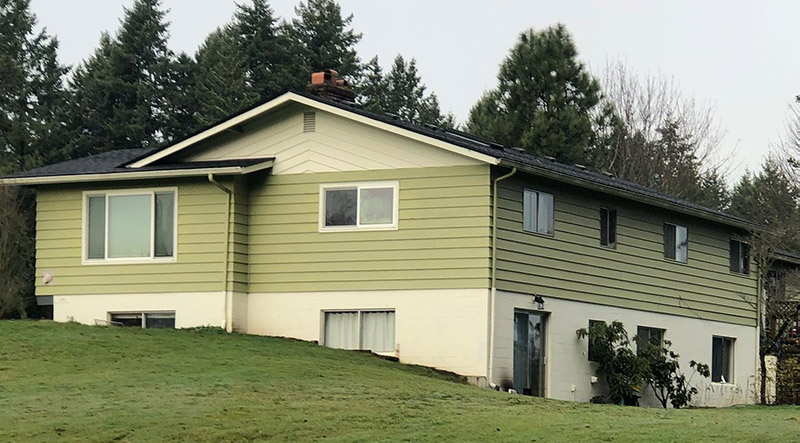
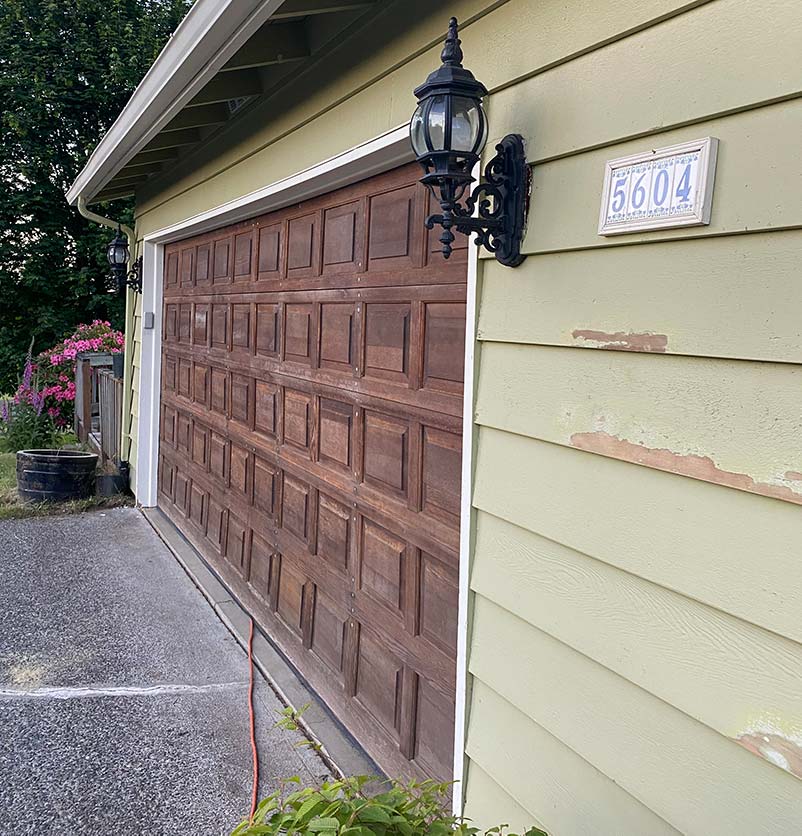
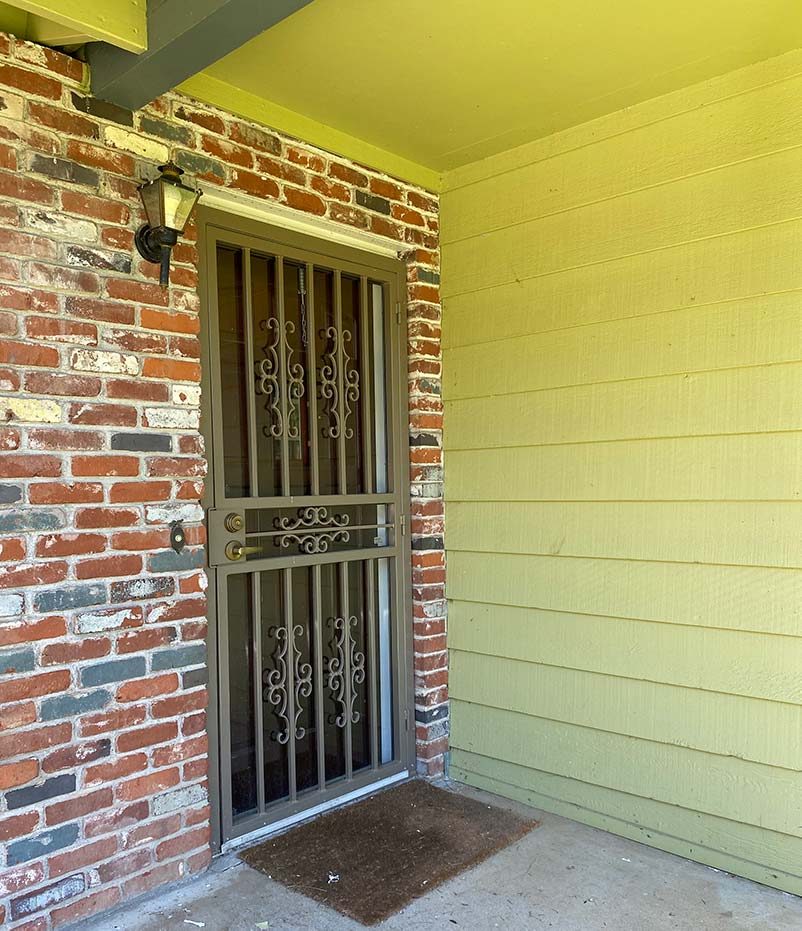
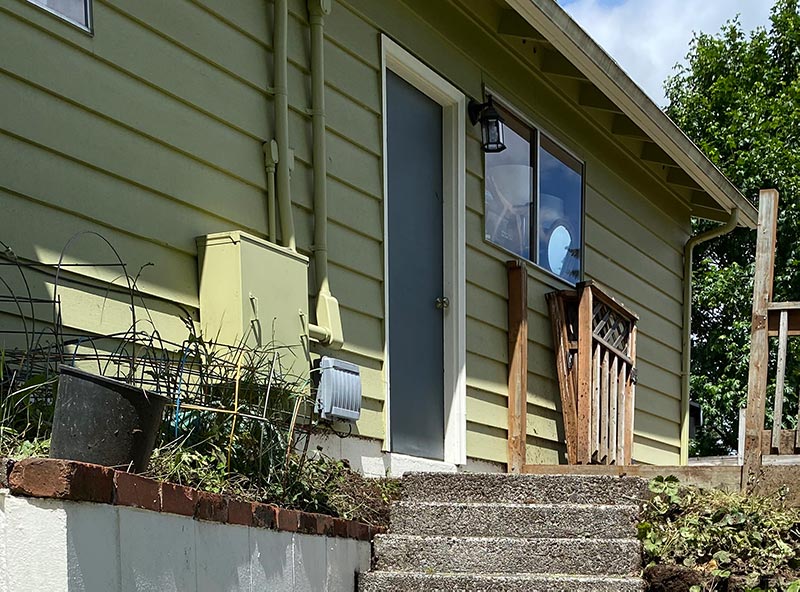
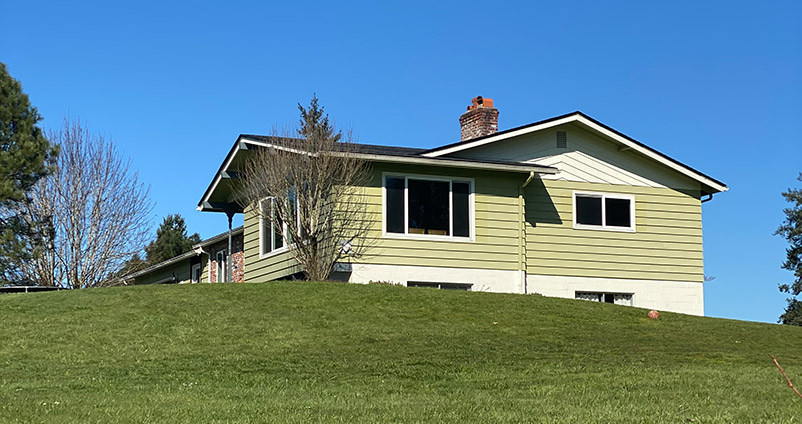
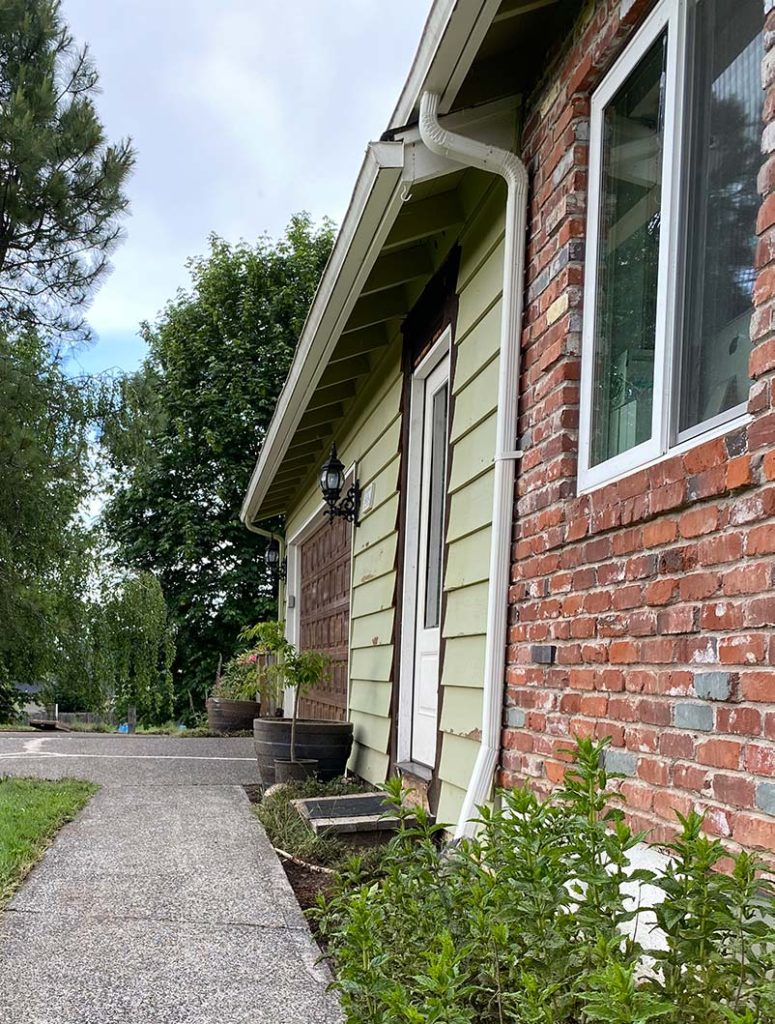
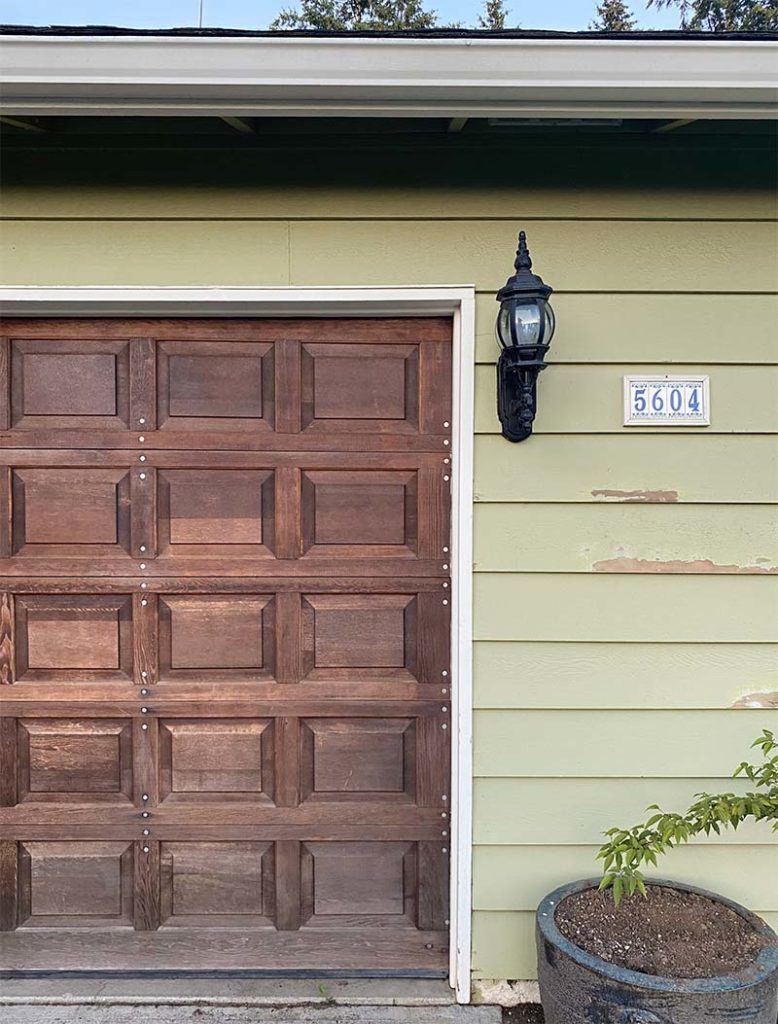
But I saw our house one day and realized that the ugly, dated, icky, green paint had to go. The paint was chipping. There were large panels of the house and brick that were stained.
Friends, it was bad. Real bad.
So I painted it. And you asked questions! Here we compiled all the answers for you in one convenient spot.
Why did I paint my house white?
Home color is a very difficult choice. House colors tend to stick with larger trends, but they feel very permanent because you don’t really want to repaint every year.
We all know these phases of home colors. The pastels of the early 2000s still haunt many of our neighborhoods. And as I look at the new houses being developed nearby, the same grays and browns dot every street.
Whenever I do something, I try to look a little ahead of the trend curve. I try to avoid the color that is trending because my eyes or going to tire of seeing it so much. I want it to feel like a bit of a stretch. I pivot it a little.
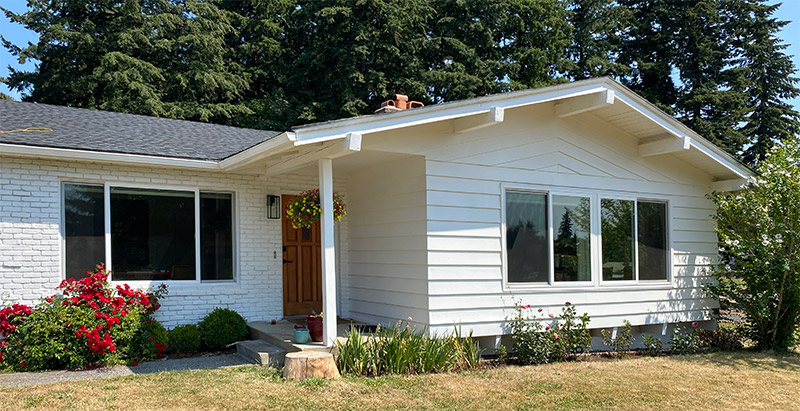
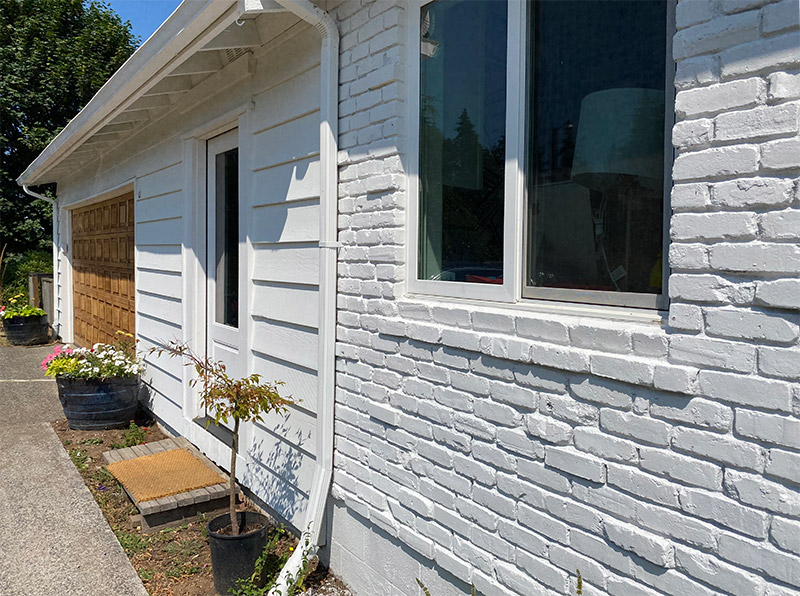
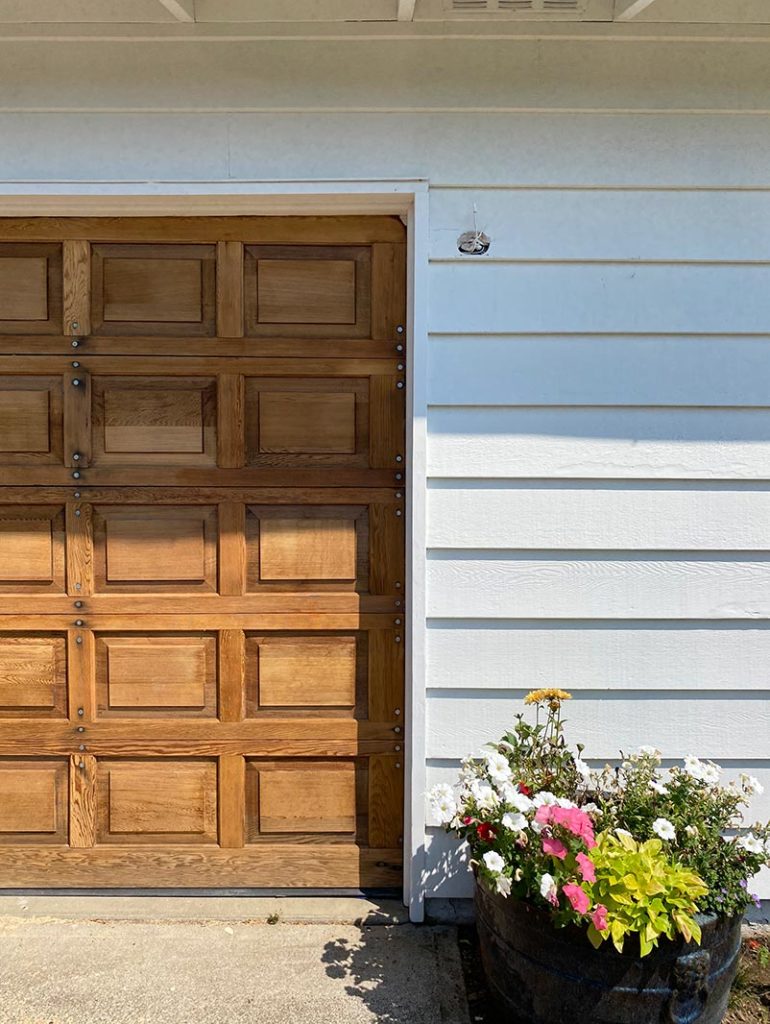
White is classic. It’s timeless. Because of that, I knew the color was going to last for years to come. I looked at homes in around Vancouver and online and realized how much I loved white homes with white trim. I’m very much into that.
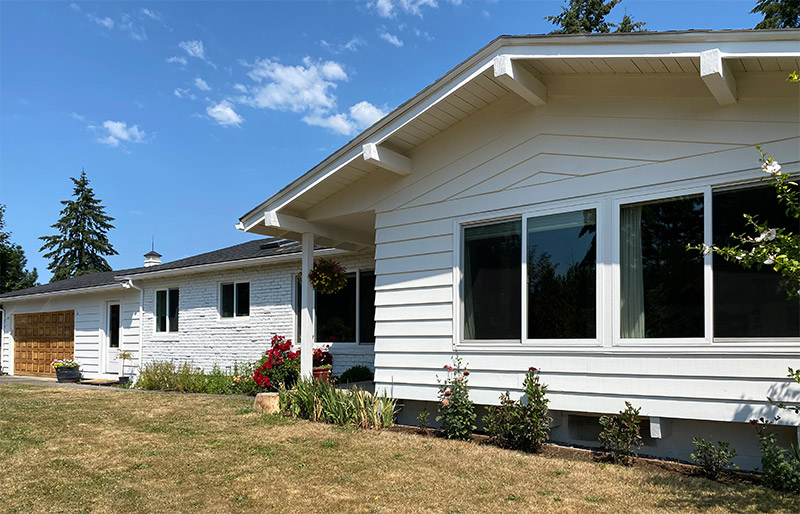
I had a hunch that all whites on the exterior of a home will have a similar appearance from a distance. While I think that may be partially true, I found a house nearby that I loved. I snuck out one day, walked up to the house, and took my Sherwin Williams swatch book out and matched it.
It was Snowbound SW 7004 by Sherwin Williams. My sister ended up painting her new build home this color too and when I saw it on her home, I knew it was just right.
A second motivation for painting it white is that I’m a muralist and I need a canvas. White lets me play with colors however I choose and doesn’t force me to stick to certain palettes.
Plus, my husband refused to live in a black house on a hill. Something about it feeling creepy? Lol.
Should I DIY Paint My Home Exterior?
Painting your house isn’t the right decision for everybody, but I can say that I had a great experience. Let me talk through some of the most common questions I got about it and you can see if it makes sense for you.
Why did you decide to paint your house yourself?
The cost was my primary consideration. Having your home painted by professional painters can cost anywhere from $10,000 to $15,000 in Vancouver. That was a price tag I couldn’t easily stomach with all of the other renovations our home needs.
The costs were:
- Sprayer: $419
- Sprayer tip: $28
- Extension: $30
- Masking materials: $29
- Paint: $2214 (Sherwin Williams often has 30% off sales which would make this $1550!)
- Total: $2784
It was clear that if I could feel confident painting it myself, it was the best option.
I had prior experience painting a home. In college, I painted a house, but we did it the worst possible way with rollers and brushes. It was torturous and it took weeks to do. I realized that if I was going to do it myself I really needed a reliable paint sprayer.
Another question I’ve received is whether you can tackle this project alone. The answer is not really. I did all the work on my own, but I needed help to move the ladder, snap the chalk lines, and support with some of the masking. You’ll need to have another hand to make this work and you always need to have another person around if you are getting on a ladder.
What paint sprayer did you buy?
I’ve used paint sprayers before and have been blown away at how quick it makes these projects go.
I chose the Graco Magnum X7 paint sprayer. After a bit of research I also bought a special sprayer tip. I purchased the .17 tip. I did that because the exterior paint is typically thicker than interior paint. This helps prevent clogs and makes it so you don’t have to thin out your paint at all which you often have to do with a sprayer. I also bought an extension rod which gave me much more reach. It made a huge difference while working with a house surrounded by hills.
I read a bunch of reviews and talked to the people at Sherwin Williams about what they recommended. It was an investment for sure, but compared to the amount of money I would have spent to have someone do it professionally, it was nothing. Plus, I could use this paint sprayer for all future projects.
There is another slightly less expensive model that’s equally great. The reason I went with this one was that it has a hook for your paint bucket and, considering I was doing this by myself, it was a nice perk.
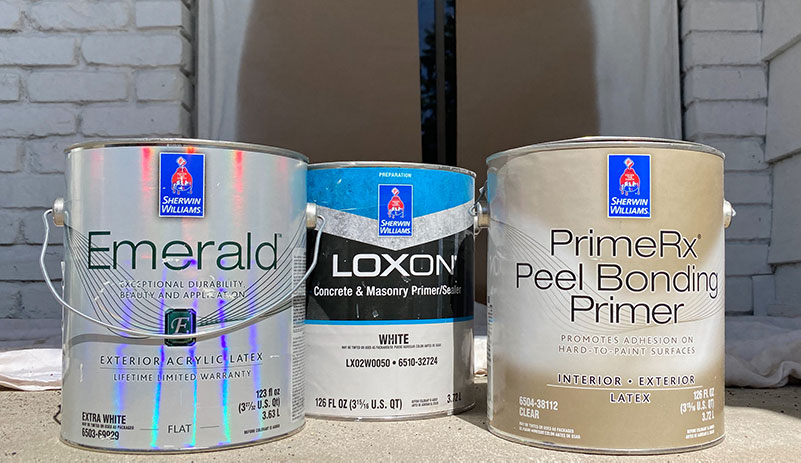
What paint type of finish did you use?
I chose Sherwin Williams’ Emerald paint for the exterior and chose a flat finish. However, I wouldn’t recommend using a flat for spraying. I would use satin or semi-gloss. When you’re spraying, you get a bit of overspray. Because of that, it creates a rougher texture. In the areas where I rolled it, the flat finish had a smooth and washable finish, but in the sprayed areas, it has a more textured feel and it’s a bit harder to clean.
How do you calculate how much paint you need?
This part can be very intimidating. Without prior experience painting a house, where do you start figuring out how much paint you need for home?
Sherwin Williams has a paint calculator on their website. It was a lifesaver. I can’t tell you how easy it made it to calculate what I needed. You will have to go out and measure everything. This includes measuring the sides of your home, including the windows and eaves. But once you have those numbers, you can just plug it into the Sherwin Williams paint calculator and it will give you the info you need.
For my home, I needed 23 gallons. That ended up being almost exactly right, with a little bit of reserve for touch-ups and for areas that needed additional coats.
The paint was easy to get it too. I preordered my paint with Sherwin Williams, then I did curbside pick up and had them bring it out to my car. Easy-peasy.
Preparing Your Home Exterior for DIY Painting
It might surprise you, but the prep work took me much more time than painting the house. For our home, it was about 2-3 hours preparing tape and a 2-3 days of pressure washing. Painting only ended up taking 2 days.
Be prepared to spend several days getting the house, surface, and areas around cleared for your paint job.
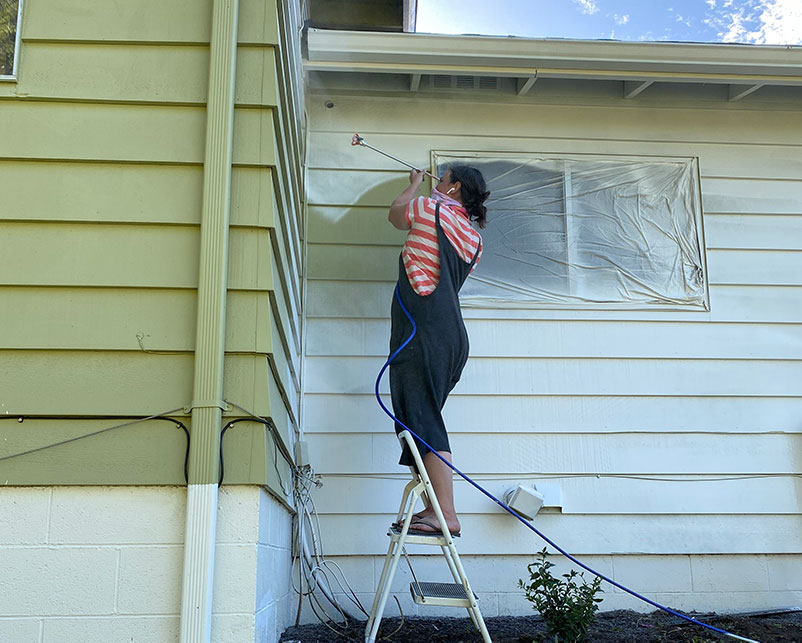
How did you clean the exterior?
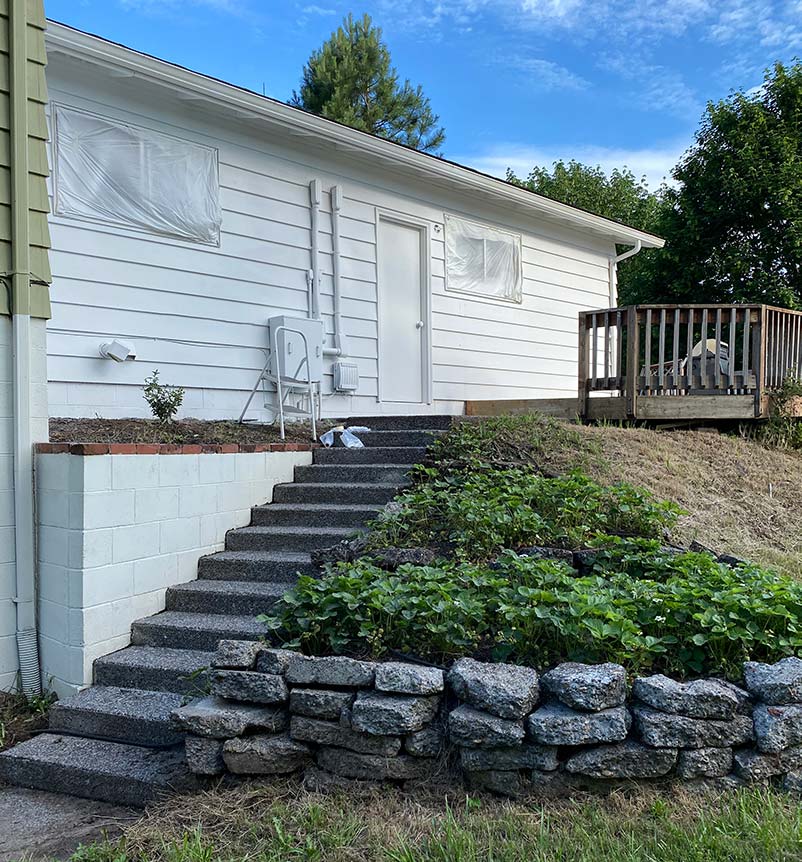
Your paint job is only going to work well if you have a clean surface. I started by pressure washing everything. Because so much of the paint was already flaking, I first scraped off the loose paint that I could by hand. I then did a pass with the pressure washer to clean surfaces and lift off some of the remaining paint that I couldn’t quite peel off.
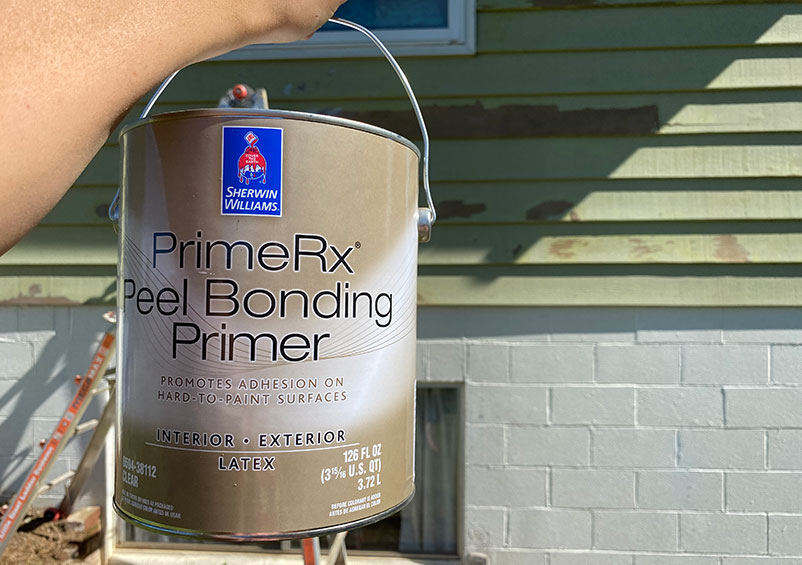
I then had to prep wood underneath with a primer. I used the PrimeRX Peel Bonding Primer for the exterior wood surfaces. The brick and other masonry had to be prepped in a different way. I used LOXON Concrete & Masonry Primer.
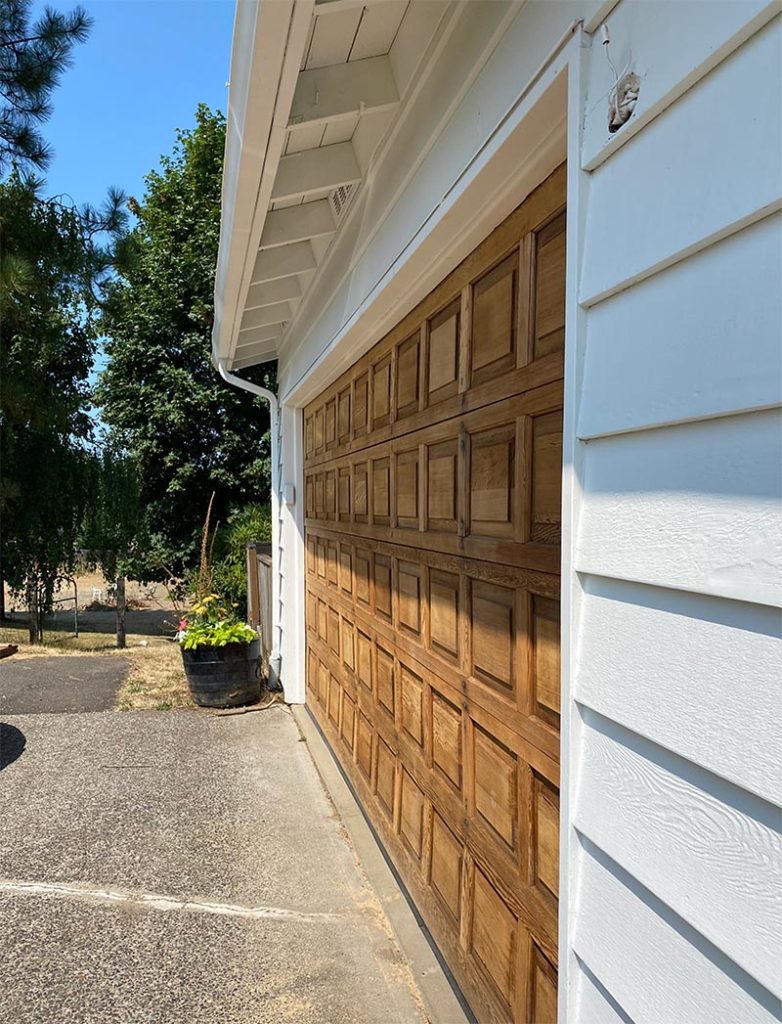
One of my favorite little projects was also pressure washing the gutters. No one wants ugly gutters up against their newly painted home.
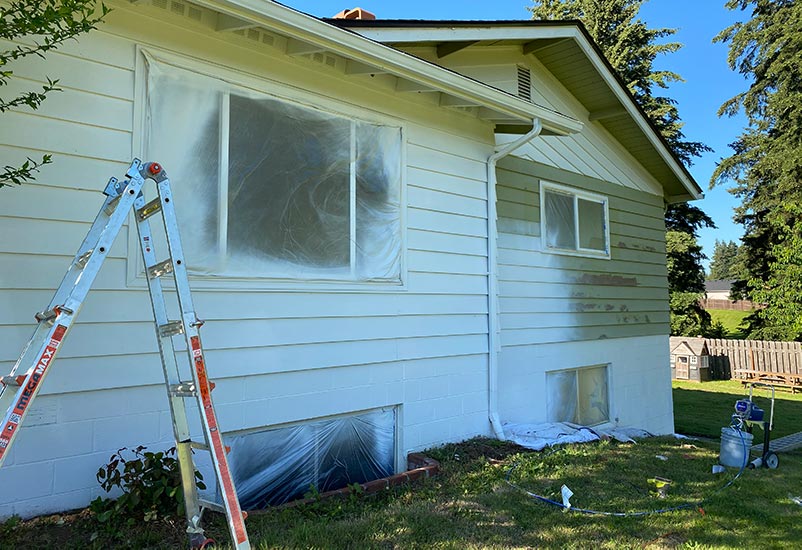
What did you use to mask off the house?
It’s important to mask off your windows and any surfaces you don’t want to be painted. I just used contractor-grade masking tape for this project, nothing fancy. I also purchased large sheets of plastic film made specifically for masking off areas. I also had a roll of paper, that was sufficient for the entire house. Cover each of these areas with the plastic and then use masking tape to hold it in place.
Any tips for using ladder?
First of all, make sure you have a nice sturdy ladder for your project that can comfortably reach all areas of your home exterior. You don’t ever want to be stretching or putting yourself in precarious positions.
You should always follow the instructions provided with your ladder for proper use.
My father, who is a retired firefighter, taught me this rule that I think is super handy. When working on a ladder, stand on a rung and reach your arms out. While standing straight and upright, you should be able to extend your arms fully and grab another rung. That’s a good way to gauge if it’s too steep or not.
We have a lot of hills around our home, which made setting up a ladder difficult. We used a shovels to dig out areas around the home so the ladders were always sturdy and balanced no matter where I was painting. It took extra time, but it made sure that I was safe for the entire process.
We considered renting scaffolding, but scaffolding would have run into the same hill and slope problems.
DIY Painting Your Home Exterior
Practice your paint sprayer technique
One thing I really recommend is taking time to get familiar with your sprayer. Start with cardboard or another surface to figure out how it works and practice your technique. It’s not a steep learning curve, but you’ll need to figure out the amount of pressure you need so it comes out in an even stream. You’ll also want to practice your distance from walls so you prevent paint drips and you ensure proper paint coverage.
After I felt comfortable, I started on the least seen side of my house first. Important tip—just in case you mess up. Use this opportunity to perfect your technique. You’ll also use this opportunity to figure out the number of passes or coats you’ll need to take.
Painting the house with a sprayer
I will never go back to rollers and brushes for exteriors. Painting the house with a sprayer went so much faster than I anticipated. Like really fast.
The paint covered WAY better than I expected. I thought I’d have to do many, many coats covering a green home with white paint. In the end, I only needed two light coats while working in one area. Later, I’d come back and it looked great and didn’t require an additional coat.
I then continued to work around the house, one side at a time. I made sure that the areas I took on first were the easiest to access and less visible so I felt totally confident when I reached the difficult areas.
I had a little problem with some overspray on some surfaces, but I went back and hand painted or spray painted areas that needed touching up.
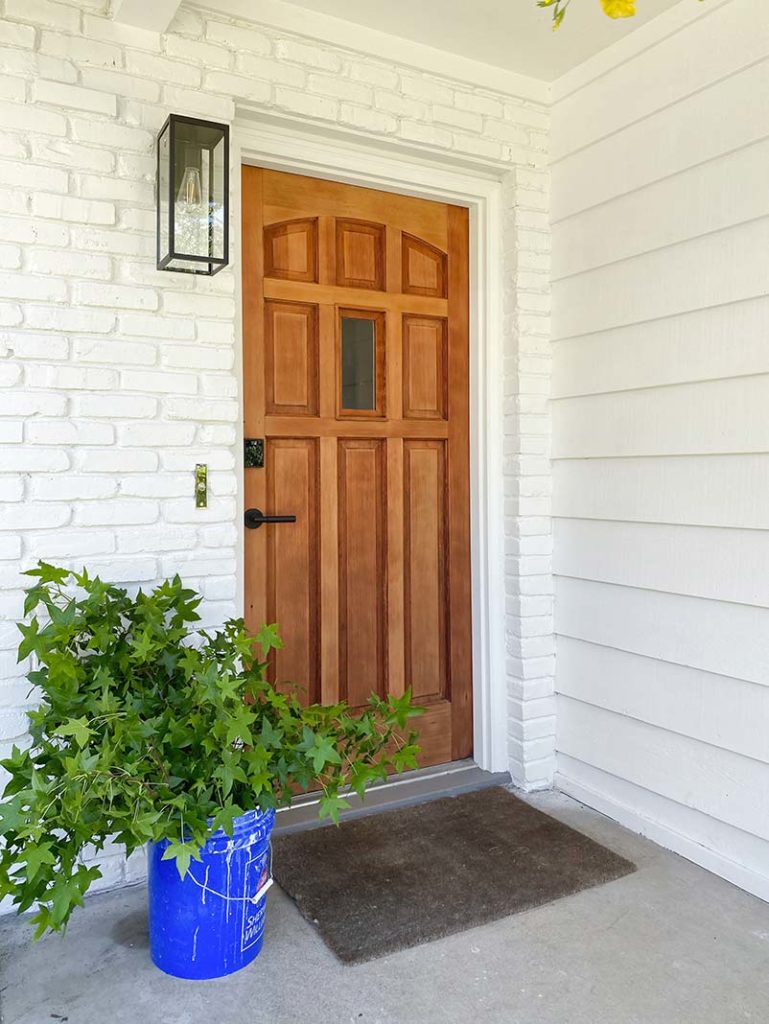
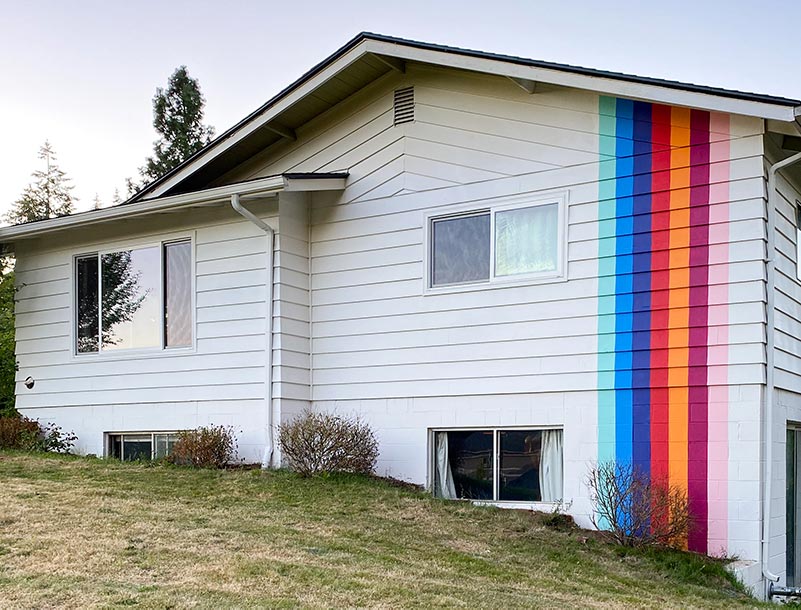
After I finished the house, it felt SO much better white. It was no longer an eyesore, it was a cute little house on the hill.
But it felt a little empty. Our home architecture is not the most exciting thing. Just like the interior of our home, I thought it was begging for a mural.
Painting Murals on My Home Exterior
Before I put up my blue box and beautiful stripes, two sides of the house just had long expanses of a white walls with no architectural features. It was boring and had no interest. I am obsessed with the idea that you can create a home you love that speaks to who you truly are. And—you can do it on a budget.
Plus, now I’m power hungry with my sprayer. I will paint all the things.
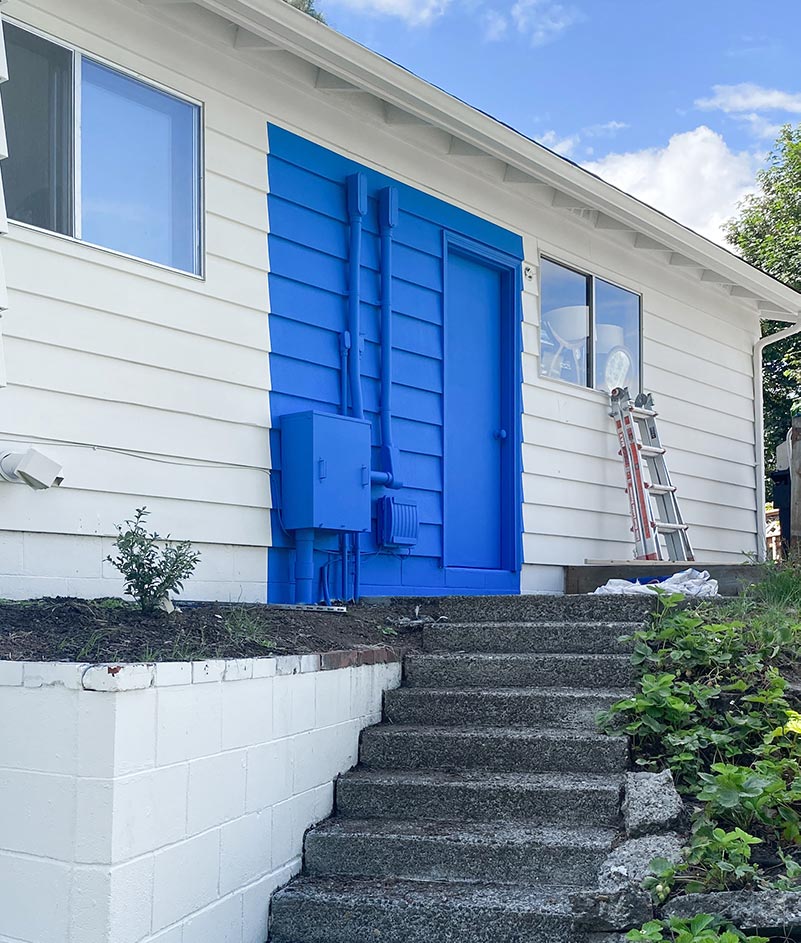
Blue block mural
I had to have this on the backside of my house by the door. It was such a boring part of our home and there are a ton of utility boxes, and wiring on the back. It just occurred to me that if it was all painted a single bold color, it would look stunning.
I chose Sherwin Williams Blue Chip paint color for this area. I struggled at first with a few other colors, but found Blue Chip to be striking, but calming. For an area right next to our peaceful outdoor space, it needed to feel cool and calm.
How did you design the home exterior stripes?
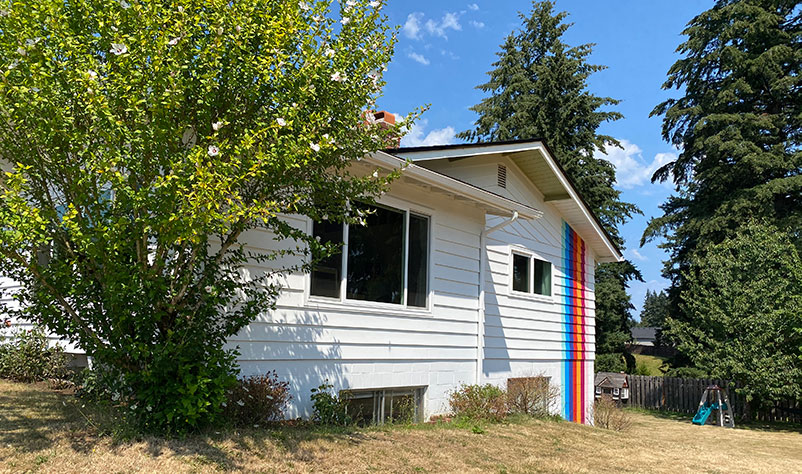
I first considered something wider, bolder, or horizontal that required a larger area. But I wanted something more simple. The simpler the design, the less likely I am to tire of it. I felt that I just wanted it to be a clean, fun punch of color. I think if I had gone much further it would have read too juvenile.
I also decided not to paint in the direction of the siding. We have two different types of siding on our home that sometimes feel disjointed. I wanted to unify them with these stripes. I think if I had done it the other way, it would have accented the already chopped-up looking exterior.
I redesigned that a million times. I even had three different versions the day I was painting.
How did you pick the colors for your home exterior stripes?
I looked back at murals that I’ve done that, years later, I still like. There were certain colors that continue to withstand the test of time for me.
I didn’t want the colors to speak to any particular trend that was happening at the moment. I didn’t want them to be tone on tone, earth tones, or retro colors. I wanted them to be an independent collection that would withstand time longer than a trend would. Even though they are rainbow colors, I made sure they weren’t in a rainbow configuration.
I started with a couple of colors that I love and expanded from there. I cut up my Sherwin Williams swatch book (I know! Blasphemy!) and began playing with them. You guys, I do this all the time. I’ll be bingeing a show and I’ll just be holding swatches and shuffling them in and out until something feels right.
But in the end, I found the clear winners. The colors I ended up choosing were the following:
- Aqueduct SW 6758
- Dynamic Blue SW 6958
- Morning Glory SW 6971
- Stop SW 6869
- Carnival SW 6892
- Forward Fuschia SW 6842
- Lovable SW 6590
I used Sherwin William’s Resilience paint for the stripes. This paint is great for exteriors and comes in quart sizes which is all I needed for my stripes. When painting exterior murals I don’t do any sort of clear-coat. Exterior paint doesn’t need it.
Painting the stripes
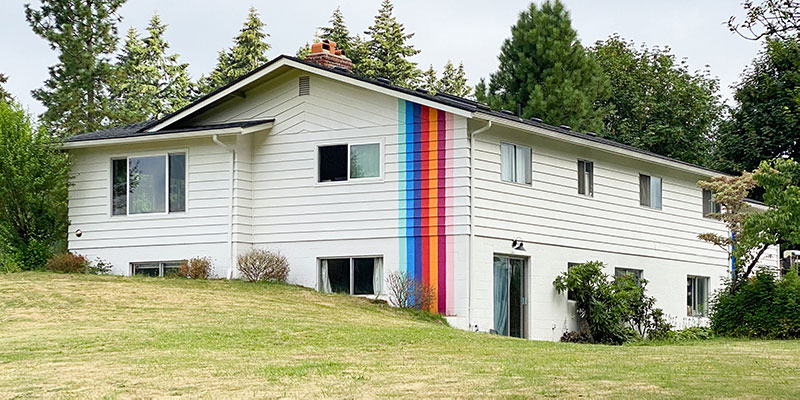
I loved this project. It took a lot of of time and several passes to get it just right. This house just really needed a focal point. It’s the side of the house you see when you first approach and I really wanted it to pop. Our home interior is full of life and color and it just made sense for the exterior to do the same.
The first thing I did was get the lines up on the side of the house. It might seem really difficult to get straight lines with shiplap or paneling, but if you have a chalk line tool, it’s a breeze. I just marked at the top and bottom of where I thought the lines would need to be. I then ran a chalk line thread down, let the bottom weight hang so it was plumb and then snapped the line. I then taped off the stripe areas and began painting.
Watch my story highlight to see the whole paint process.
After I finished it, I realized that something was still off. Some of the spacing wasn’t quite right, so I climbed back up and shifted the lines over.
Now it looks like this and it feels incredible! It has brought me so much joy to have this on the outside of our house. Now as I drive up our driveway, I feel excited and I feel like it actually says something about the design, art, and life inside our home.
What will the neighbors say?
Okay, I know this is what’s on everybody’s mind. So let’s dive in.
The day afterward, one of our neighbors came over and told us how much she and her daughter liked it. But it’s self-isolation time so I haven’t talked to a ton of our neighbors.
I will say that we are in a unique position. One of our neighbors has a chicken shed that’s painted robin’s egg blue and hot pink. A house down the road is construction zone orange. There’s a microbrewery with a giant red tower popping out around the corner. Yes, we have the standard new development houses that all look the same nearby, but we are directly next to a bunch of homes that have been here for years before all the new developments were put in.
We don’t have an HOA or zoning laws that prevent anything like this. And to be honest, our home was in major disrepair prior to us moving in so I think everyone is grateful we are doing anything to the property.
What do you do if you have an HOA? I’d recommend talking to them. Submit a design, get on your HOAs agenda, and have a discussion. Our last HOA was flexible on some things but not others. It never hurts to ask.
Then if you are renting, what do you do then? Well, your landlord might not go for the stripes or mural. Again, worth asking, but you’d need to have a clear plan for removing the murals and covering all costs. That’s our current arrangement. But if you just want a new paint job for your rental home, ask your landlord. They want their rentals to be in good condition too. When we were landlords, we appreciated anything our tenants did to improve the house. Get bids for the paint. Present a plan if you want to do it yourself. Make it clear the research you’ve done and precautions you’ll take.
Oh, last of all, I got this question:
What does your husband think?
Hi, this is Garrett. I love it. I love the stripes with all my heart. To be honest, with mushroom/gnome lawn decorations and really ugly Americana decorating half the new development homes nearby— I’m not too worried about what our neighbors think.
So there you have it.
What’s Next?
Repainting our home has made us realize all the potential this property has. I think we’ve always been fighting against the exterior of our home, and now we don’t have to. This has made me excited to landscape and create better outdoor spaces for our family.
The stripes have allowed me to assert my personality. We spend so much time hiding behind what’s expected, it’s nice to make a bold choice. I love that the inside of my home and outside are now cohesive and expressive.
There might be another mural or two up my sleeve on this exterior. Small ones, but really bold and fun.
My advice to you is don’t settle for the color you hate. Painting your home shouldn’t be this terrifying, huge-cost pain. Breathe life back into your home. Now get out there and make something exciting!

We bought the slightly cheaper Graco sprayer last weekend in anticipation of painting our new house exterior (currently ugly baby blue). Can’t wait! Thanks for the info and inspo 😊
I’m thrilled to read this! We have an older home that badly needs to be painted! I love your color sense & desire to express yourself. Love love love!
All our kids are older now so I’m looking forward to what I can do with my next toys-i mean tools.
And I love Sherwin Williams paints. I’ve been a huge fan for over 20 years (my paint chip is’fan’ well worn). I’m so happy you have a good relationship/experience with them. Thanks for going into what kind of paints you use on different parts of the house & why. It’s a great education for DIY’ers.
Muah!
It looks so fresh with the white! And that mural is just fun. Love it!
So I found this post on a Google search. And I had to comment. Because the stripes down the side of the house make me think of the color just bursting out of your house and coming down the sides. Which is a visual that I will keep with me when updating my home.
You’re definitely right when you said that finding a good color for your home is extremely difficult. My husband and I have been indecisive about the matter for a while now. You’re really right about white being classic and timeless thought. It’s sure to be in style even years later and is the safest choice. If we can’t decide on one we should go with that instead. We’ve decided we will hire painters to do the job for us instead of doing it ourselves since we aren’t good at it. Especially with how many things you need to consider for it.