
Thunder bellows throughout the basement of Racheal Jackson’s home.
It’s me, Racheal. I’ve spent countless hours in this basement—alone. My diagrams are scattered across the floor. The neighbors think I’ve gone mad. My family has left me alone to my own devices, but I’ve done it. I’ve finally done it.
It’s alive!
Sorry, had to commit to the bit.
Look, these new cabinets had me 100% in Dr. Frankenstein mode. I have chopped, ripped, torn, and disassembled. And when I was done, I stitched it all back together using the old materials. But in this instance, we’re talking about cabinetry and not… uh…. corpses. Ew.
So that’s neat! Let’s pivot this conversation as fast as possible!
The Sink Grew Three Sizes That Day
You’re probably asking yourself, why on earth did you need to reconfigure the entire cabinetry and why did this take an entire week? It comes down to the most important pieces in the room. I’ll talk about the table later, but the sink was the primary driver.
The sink is the heart of the kitchen. It’s a beautiful mint green and I pet it gently every time I walk past.
Did you know I love food? I do. I do so much. I eat it almost every day. But you know what I don’t like, dishes. And there’s no washer. So obviously, the sink had to be three feet long. Perfect for me to comfortably abandon my dishes. Mwhahaha.
It’s a truly giant sink. Large enough to make you tilt your head and mutter to yourself, “yeah, I could probably fit in that.”
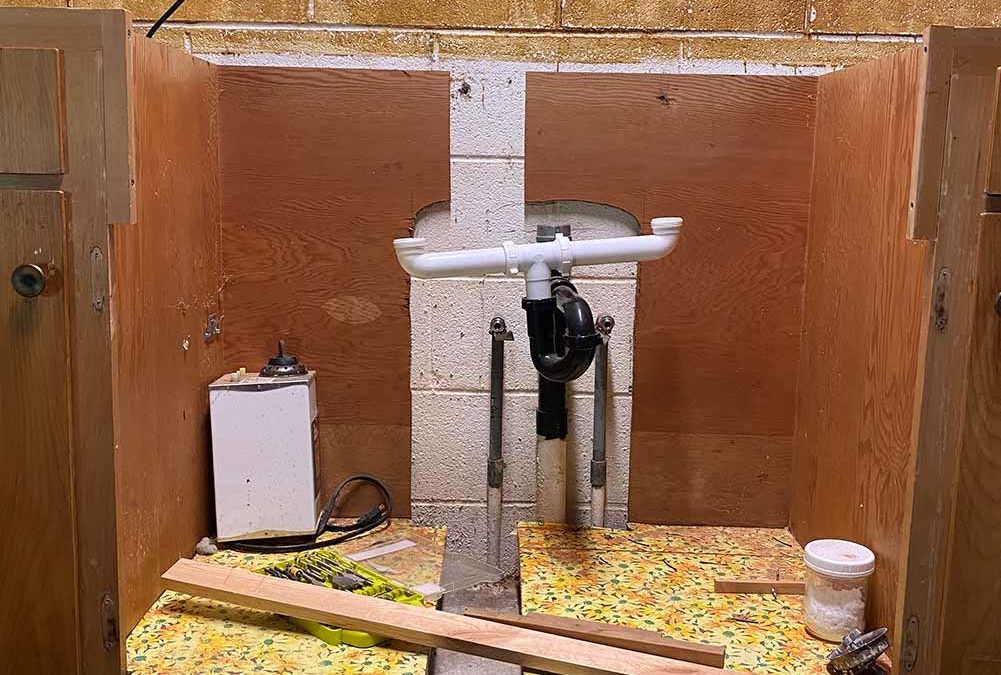
The heart transplant was what required the cabinet reconfiguration and expansion. The current sink was very small and had that quality of old sinks where no mater how much you clean it, heaping mountains of product on it, and scrubbing it with industrial machinery—it’d still look grimy.
Cabinet Expansion Time-Saver
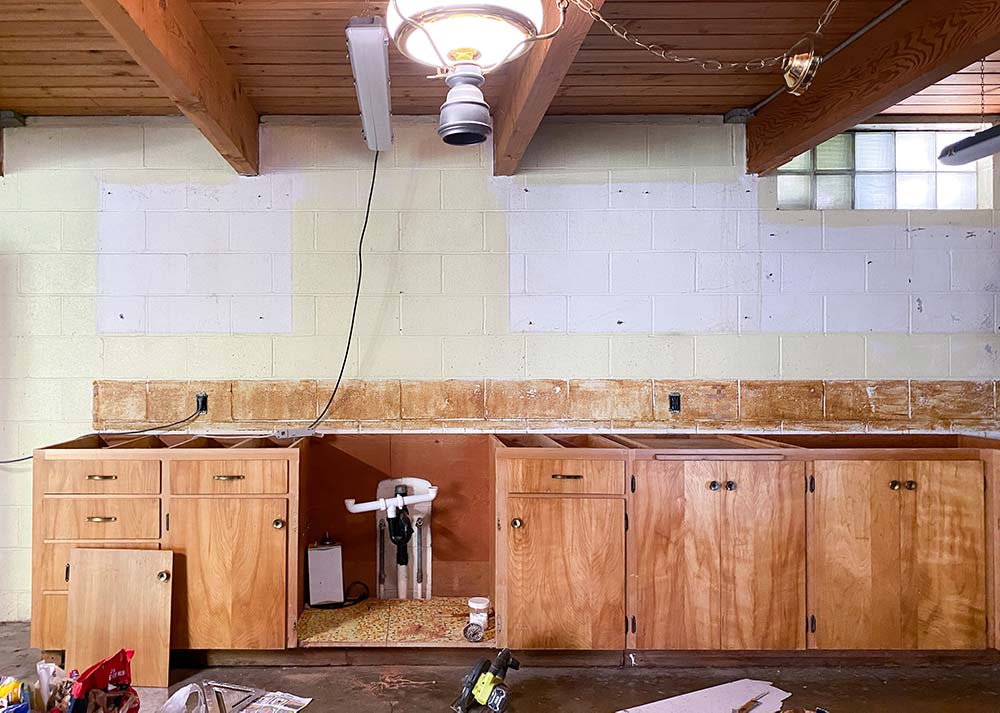
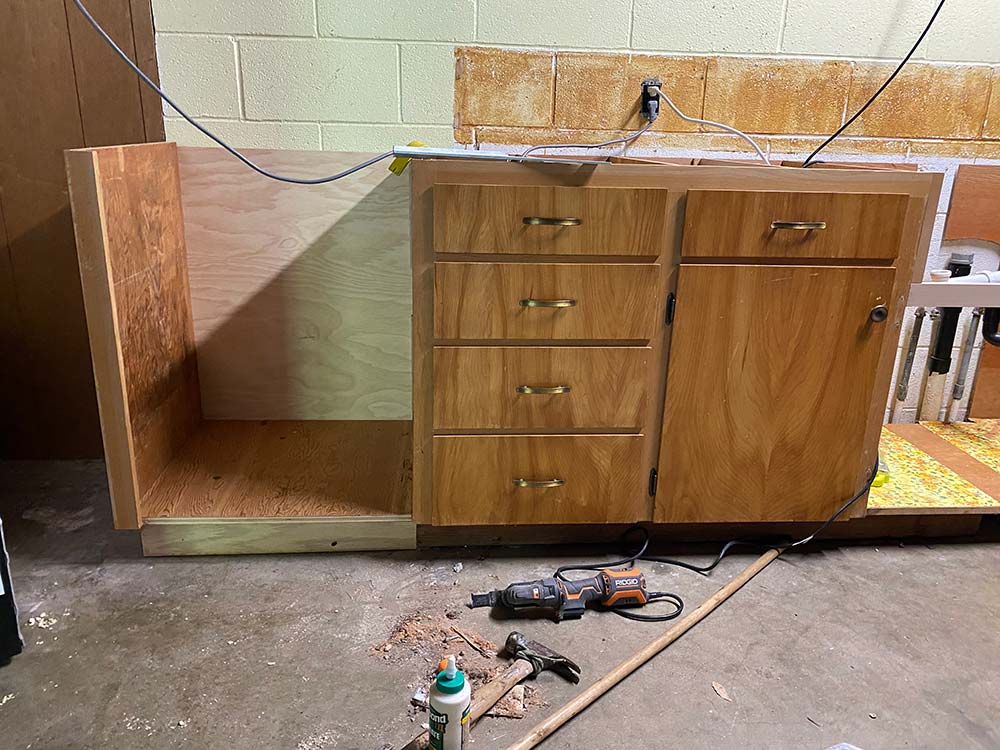
From the beginning of the project, I’ve been dreading this expansion, because of all the work that would need to be done. In order to expand it three feet, I needed to cut the cabinets next to the sink cabinets, move them down five inches, rebuild the drawers, cabinet itself, shelves, and reconfigure the entire thing.
There were also a ton of seemingly impossible, awkward cuts that would need to be made. And friends, I’m good at construction, but this was giving me stress dreams—intensity between a dinosaur pursuing me and realizing I forgot to attend a class for an entire semester. Half of this week was spent staring at this cabinet in dread.
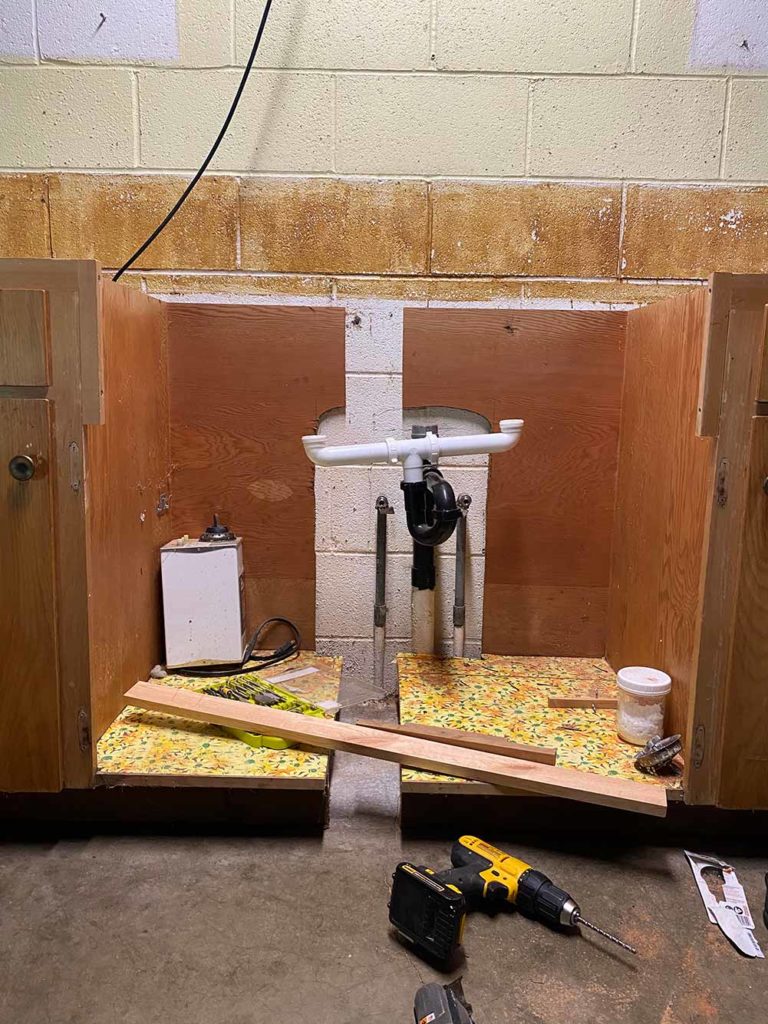
But then I showed my sister what I was doing. She was like, “Wow, that’s really smart that you’re just going to cut the sink cabinet down the middle and slide it down.”
Cut that Gordian knot with Occam’s Razor, whydontcha!
I might have had an out-of-body experience when she said it.
Obviously! Instead of rebuilding and reworking it all, I just took a saw, made two cuts, and then slid the cabinets down to make room.
That night, I dreamt about doing a mural in the home of Mindy Kaling. No more stress dreams.
My advice for anyone rearranging their cabinets going forward. Spend a lot of time looking at it with another person to see if there’s a simple way to approach it.
Recycle, Reuse, and Reconstruct
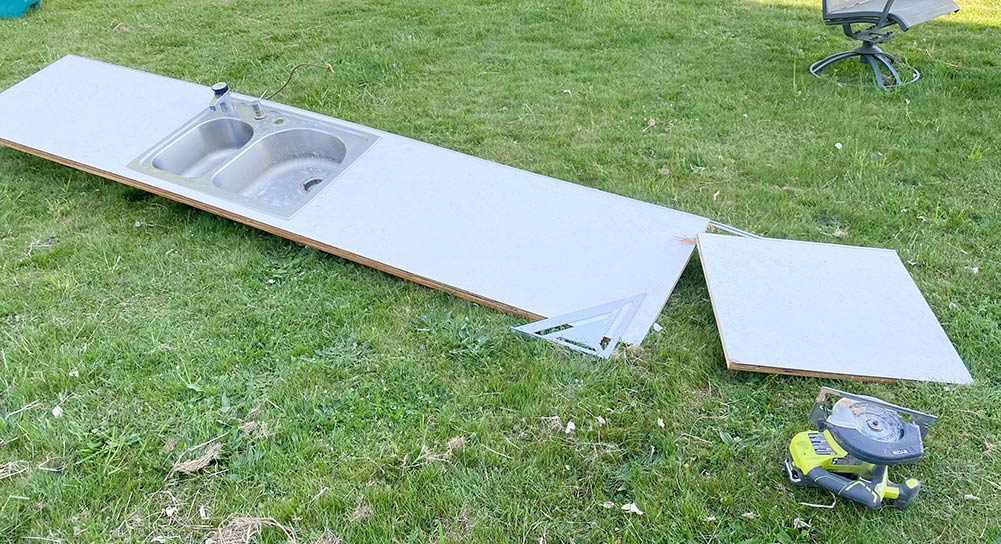
When I removed the formica countertops last week, I took note of all the material that used in their construction. One of my goals for every project is to reuse and repurposed as much as I possibly can. First, i think it’s an important commitment that we make to the environment to be responsible with the materials we use. Secondly, because I’m cheap. Like dollar menu at Taco Bell cheap. Third, because it’s a challenge worth taking on.
Underneath the formica countertops was this incredibly solid plywood. I’ve been reusing it all to reconstruct the cabinets. It’s perfect too because it’s pre-sized! Because it was previously covering the cabinetry as part of the countertop, it’s already the right size and depth.
I’ve just been sneaking outside with a circular saw and square and lopping off chunks of it.
Constructing the Sink Base
I’ve spent a lot of time studying the specs of the sink. I’ve been through Organic Chemistry study groups that were easier than this. I’m all about DIY, but there is definitely something to be said for hiring a cabinetry contractor or carpenter to assist on these projects.
I’ve measured everything, but I’ve been thinking about how to use the materials and get it cut just right. It’s so important that I get the right fit for the sink. The sink has specific layers and cuts it needs to fit snugly in place. I cut the boards into the appropriate lengths and built the framework for the sink.
The Secret Cabinet
The other main driver for needing to expand the cabinetry is my 100 year old table. I love the look of this vintage piece and cannot wait to have it in this space. But it is like the exact size of the previous cabinetry. Which I think would just look a little bit awkward.
I have this vision of doing a hutch on top of the countertops to the left of the sink. But the issue was that cabinets didn’t go long enough to fit the hutch between two beams. It needed to be move down a few feet.
In order to meet both of these needs, I built a new cabinet onto the end of the existing cabinets. This one adds two feet.

And guys, you know what? I’m not adding shelves or a drawer structure to this cabinet either. Why? Well, funny story. My eldest has been asking me for years now to build secret places into the house. I thought my super cool treehouse in his bedroom would be enough, but he frequently likes to find small enclosed spaces and nestle. Like, he will get in a box with a book and a blanket and just read. Just picture Harry Potter in his cupboard, but he never left because he was much happier under the stairs.
So, I did it. He’s now got a cabinet downstairs just for himself. It’s weird, but hey, if it means I don’t have to build a drawer or install some shelves then I’m in!
As Scrappy As Me
The new cabinet was entirely built out of old materials. I built the base and structure from the leftover countertop plywood and it worked beautifully.
I tried to use the doors that I pulled off from the cabinets below the sink, but I cut them a bit too short. Two inch gaps are like, in, right? Nah.
So I went down to our barn, nearly got crushed under the weight of several ancient Ethan Allen pieces and then removed the doors from some of the uppers.
And then just like a self-conscious teenager headed to an 8th Sadie Hawkins dance, I applied make-up liberally.
I filled all the holes that I created with wood putty. I also filled in the gaps between the old and new wood. Then I sanded it all down. I also did a rough sand on the cabinet fronts. They are really pretty, but they’ve been really dinged up over the past 50 years.
To wrap it up, I applied some liquid sandpaper. It etches the surface to make it better for primer. By removing the varnish and gloss it can more easily stick to the surface. You can use deglosser or liquid sandpaper for this, they’re pretty much the same thing.
Then I stood back and looked at the cabinet. It looked like it belonged. Like it fit in. Like that even though it’s date ran off with Kristen and it was now alone, at least it was with its friends.
8th grade was rough.
The Hardware Has Seen Some Things
I’ve been debating all week about the hardware. Every part of me wants to preserve the vintage hardware that’s on all of the cabinetry. But after inspecting it closer, it doesn’t look like it’s good quality to begin with. It has a bronze finish on it, but it has been rubbed off over the years. The black metal underneath is all exposed.
I don’t know if I’m going to be able to be able to make it work. I could paint them? I could rub off what I can and then buff it with a brassy finish? I don’t know, it’s just not going to last very long because of the base material.
Feels a bit like showering before a run. Yeah, you’ll be clean for a minute, but you’re going to be gross again pretty quick. Honestly, for me, it’d be like showering after a run too. I usually just end up working on something and get covered in sawdust and paint. Truth is, I just don’t shower anymore. The people closest to me love it!
If nothing else, I could always do cheap wood pulls from Home Depot and paint them green to match.
And Now for Paint
Next week, I’m going to be tackling some painting projects. I may start with a mural in the office area or I might decide to tackle painting the cabinets. No spoilers because honestly, I have no idea what I’ll do first. Lucky you! Stay tuned!
See More From the One Room Challenge Creators
I’ll hope you’ll join me and all the other incredible creators and designers that are part of the One Room Challenge!


Ariene C. Bethea | At Home With Ashley | Banyan Bridges | Bari J. Ackerman | Brit Arnesen
Brownstone Boys| Cass Makes Home | Dominique Gebru | Gray Space Interiors| Haneen’s Haven
Home Ec. | Nile Johnson Design | Pennies for a fortune | Prepford Wife | Rachel Moriarty Interiors
Sachi Lord | Susan Hill Interior Design | This Is Simplicite | Tiffany DeLangie | Victoria Lee Jones
Media BH&G | TM ORC

I love this! Also my son is a tiny Harry Potter too! We had a big box in his room that’s been there for a long time that he likes to sit inside with his tablet and a blanket. He loves anything that’s a small space he can hide in always has since he could crawl lol
You’re just the best! I love that your sister was able to see the simplest solution (and assumed you had seen it, too, ha). This project is coming along!