
Dear friends, this was not an easy week. I did some scary things this week—like that scene in Signs where the alien walks across the screen and you have to call your Mom and say you have a stomach ache which is your code word for leaving parties early, but your sister needed a ride home first so you had to wait in the living room with your friends parents awkwardly until your mom got there while everyone else slept kind of scary.
I know. DEFCON 1.
But before you get all anxiety-ridden like I did, just know this. It ends well. Like that end scene of Signs where that little thing that didn’t seem like a big thing was actually helpful for defeating the aliens, but you didn’t see the ending until your twenties so you lived those years in fear instead of understanding the movie was less about aliens and more about grief and loss and how family carries us through happy ending.
Trust me, it ends well. Unlike some of Shyamalan’s later work.
The Sink Must Fit Perfectly
This has been my mantra to myself over and over the last few weeks. Listen, this gorgeous Elkay mint sink is absolutely stunning and I was not going to slip up.
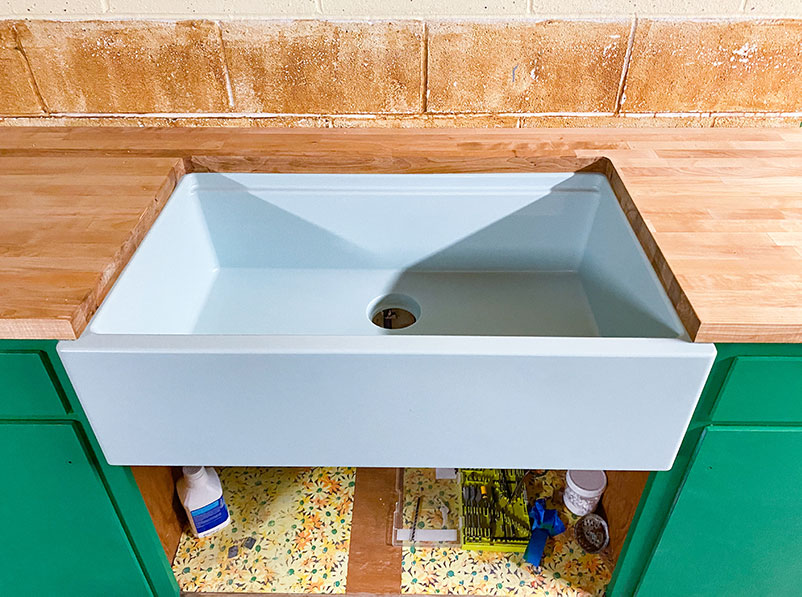
Let me tell you about this beauty of a sink. It’s made out of quartz and is anti-bacterial and very durable. Despite being this fun color, this sink is built to last. It also came with a drain that matches the same mint green too! Adorbs. It also has this cute little cut-out lip so you can put a little cutting board (provided) over the sink. I’m obsessed with good reason.
The sink is the focal point for the kitchen and one mistake with how I cut the countertops would result in me starting the countertops over. It has been tedious, difficult, and honestly made me question my life choices. Sleeping in public parks on a European backpacking trip was not a good idea. Ugh. My youth.
The apron front and undermount, everything needed to be just right. I measured, remeasured, and second-guessed myself.
It ended with me sitting on the couch scrolling TikTok sadly.
Here’s the thing. I am 100% DIY where it makes sense. If I was to do this again, I would absolutely hire a carpenter or woodworker of some kind to come and take care of this for me. It was not worth the panic and fear. The Elkay sink specifically recommend that only professionals install it.
That being said, if you are going to DIY a sink like this, here are my main tips:
- Measure everything a thousand times before making a cut
- Dry fit every single thing—don’t use adhesive or permanently affix anything until you know it all fits
- Take the time to check every line and angle as you go through every step of installation
Sink Installation
After I was confident in the cuts I had made in the butcher block countertops, I first treated them all with Mineral oil. This is one of my favorite ways to bring out the natural colors and grain of the wood and also provide some protection.
Dry Fit Countertops
I dry fit the countertops in their respective positions, making some adjustments so that it fit neatly in the two main areas where the separate pieces of butcher block meet up. I wanted them to be like Seniors on prom night close, not 6th graders Homecoming dance close.
I had Garrett help me flip the butcher block countertop that was built for the sink onto its top. We then lifted the sink onto it. I repositioned it quite a bit, measuring and making sure that everything was in the right place. I then went around it with pencil so I would have a quick and easy visual to catch if anything got offtrack during installation.
Pre-Drilled Holes for Mounting Brackets
Once it looked good, I pre-drilled holes around the perimeter of the sink. Perimeter. Look at me, using words. I feel like perimeter should only be used in action movies. Like it’s 100% a Jurassic Park line where they talk about the perimeter of the cages. Ah it totally is! The lawyer asks John Hammond, “So, the fifty miles of perimeter fence are in place?”
See. Super important to drill holes around the perimeter and make sure they are secure or you’ll 100% get eaten by a dinosaur.
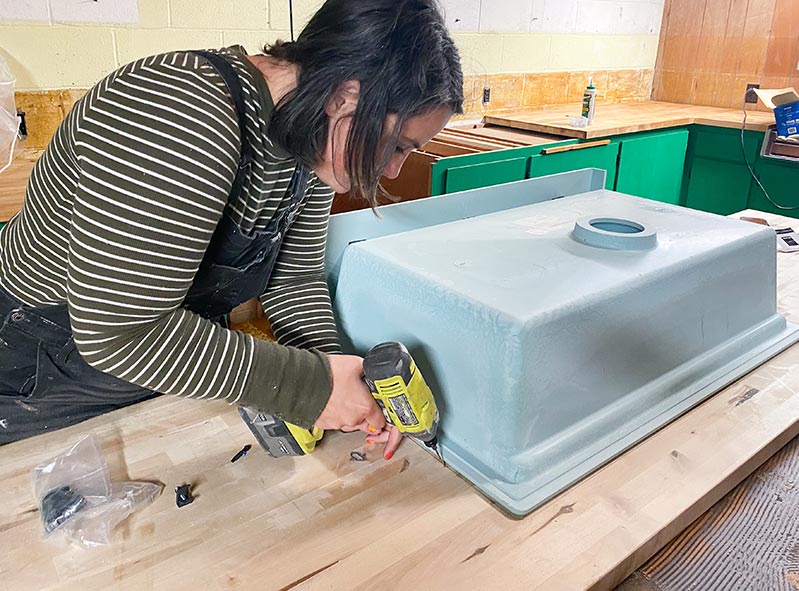
First Mounting Bracket Attachment
With the hole pre-drilled, I then used some sink mounting brackets and some fastening screws to firmly, but not fully, attach the sink to the countertop. I didn’t want it to be full compressed because I still needed to apply silicone to it. It would have been a sandwich with no mayo, mustard, or condiments and I think we can all agree that’s not a sandwich.
We very carefully lifted the countertop as close to the sink as we could to help support the weight. Then we dropped it into place. We did this very slowly and very cautiously—like rolling a toddler out of your arms to their side of the bed.
Testing the Fit
And guys, it fit perfectly. You can see my tears of joy on Instagram, but I really did start to cry. Sometimes, we build things up to be much worse or scary than they really are. And even though the monster is imagined, the fear is very real. I’ve worked on so many DIY projects over the years and if I can share my two cents—just do the thing.
Yes, you may mess it up. But procrastinating because of fear only prolongs your fear. Get out there and tackle that monster so you’ll know it’s just another lie. You are stronger, tougher, and more capable than that imaginary problem could ever know.
Undo & Try Again
This part might seem kind of obnoxious. You have to take it all back apart. Once the mounting brackets were removed and we had the sink and countertops separated, I applied Silicone adhesive. This is incredibly important because it serves multiple purposes. It’s an adhesive first, helping to add strength to the sink to countertop grip along with the mounting brackets. Secondly, the silicone helps prevent water from sneaking in between the countertop and sink where it could potentially leak or cause damage.
With the silicone adhesive applied as liberally as I apply chocolate chips in cookie dough, we were ready to place the sink back on. We lowered the sink slowly back into place and pressed down on the sink.
Then I screwed in the mounting brackets fully this time so that they were appropriately compressed and the sink was finally secure.
We lifted the sink and countertop back on top of the cabinets and magic. Like fireworks. Brilliant, green and mint green fireworks.
Remove Excess Silicone
With the sink in place and upright, I went around with a dry cloth and removed all the excess silicone adhesive from the sink. You want to make sure to get it all removed so it doesn’t gunk up the sink or the butcher block countertops.
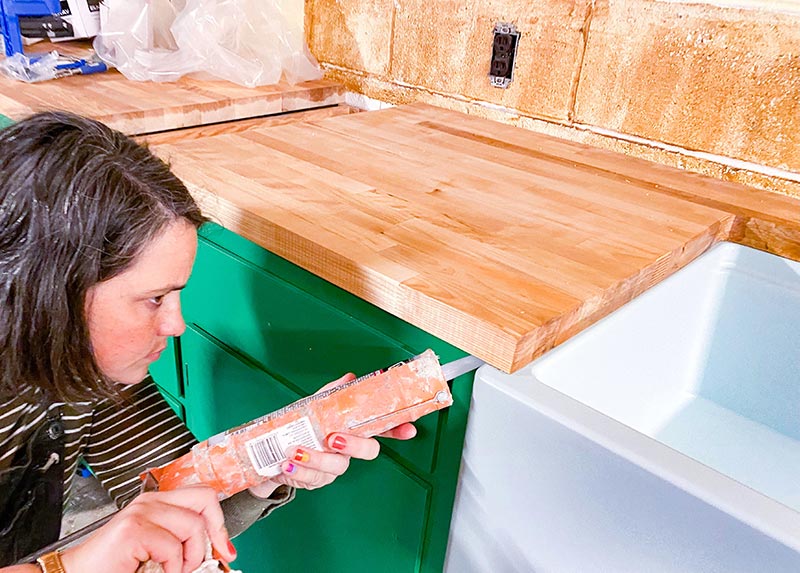
Connecting the Butcher Block Countertops
The final step was to get the countertops fit together and secured. This requires two anchoring points. The first is to connect the countertops to each other. I did this with a Kreg jig. The second is to secure them to the cabinets below with brackets/screws.
Do the Kreg Jig
I’m such a nerd. Garrett usually doesn’t shut up about video games, but I can go on and on just as long about how much I love certain tools. And the ballads I have written about Kreg jigs have made me renown spread across all the kingdoms of the earth. I’m pretty big in the “power tool bard” circles.
Kreg jigs make the process of connecting two pieces of wood seamless. With the tool, you can drill holes at an angle so that your screw pull the wood up against each other so they fully butt up. Butt up, ha.
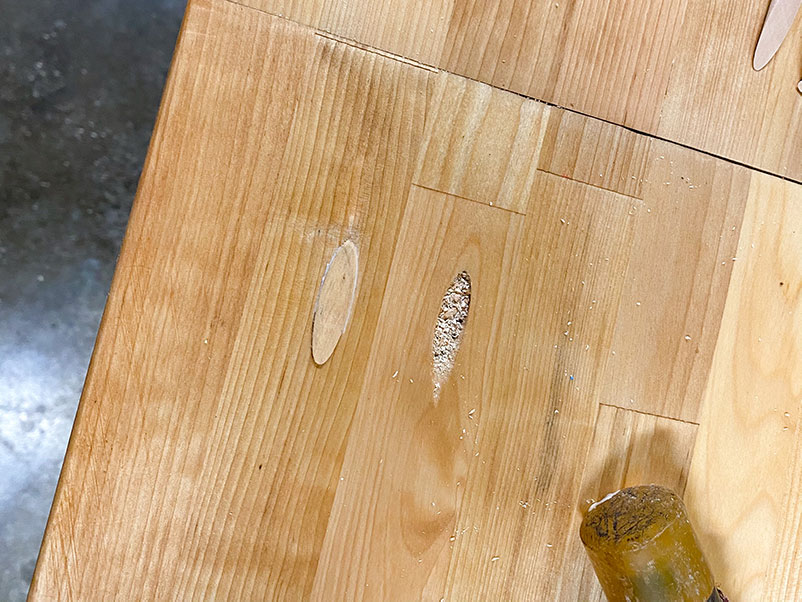
Once you have the screws in, you can then use these little plugs to fill in the holes. One tip I have for this is to use some of the leftover sawdust from the project to help fill the holes if they are slightly deeper than the size of your plugs. I used wood glue inside of them once the sawdust padding was right. Then I used a hammer and some gauze to tap the plugs down fully.
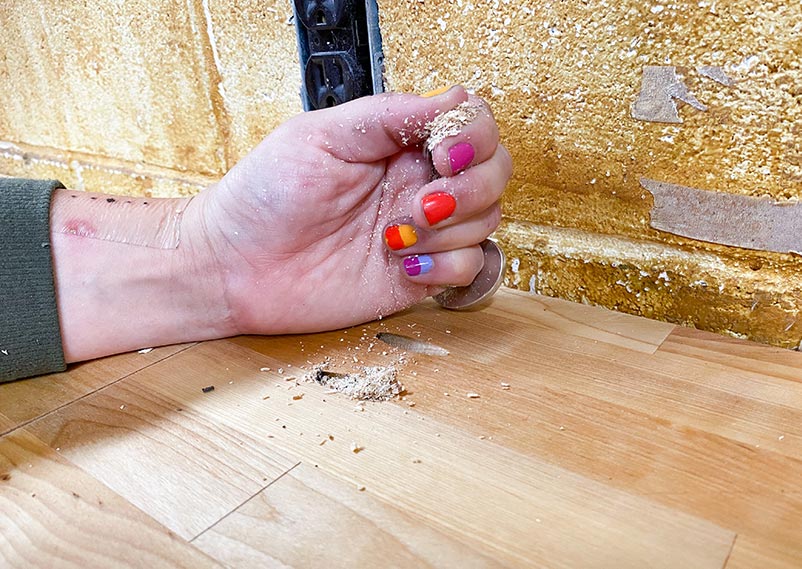
With a dry cloth, wipe up the excess glue and you’re golden!
Putty Buddy
To fill the gap or even out the spacing between the butcher block countertops, I used wood putty. It’s probably not the ideal fix but at this point I was too lazy to google it.
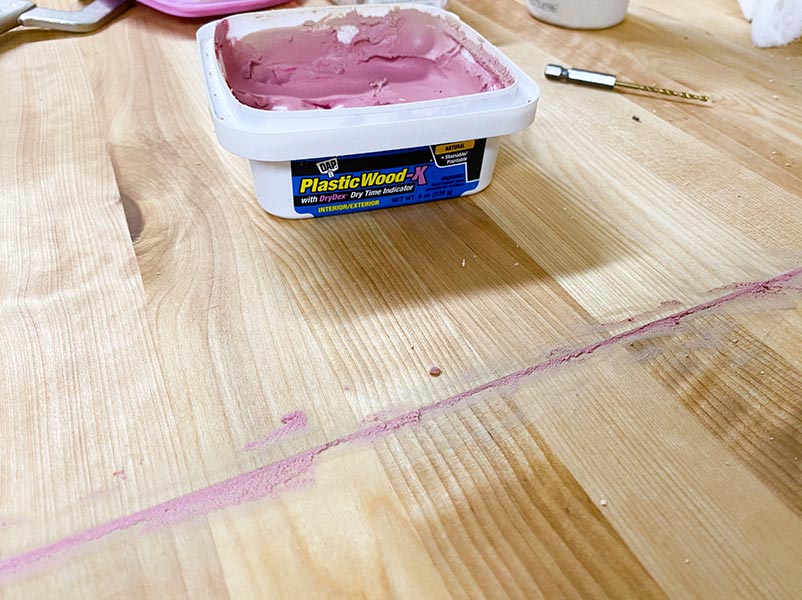
I’ve got this really cool putty that starts out purple and then when it dries, then it turns wood colored. I know! Mom never let me get that mermaid Barbie whose hair color changed when wet, but now I have wood putty. Look at me now, mom!
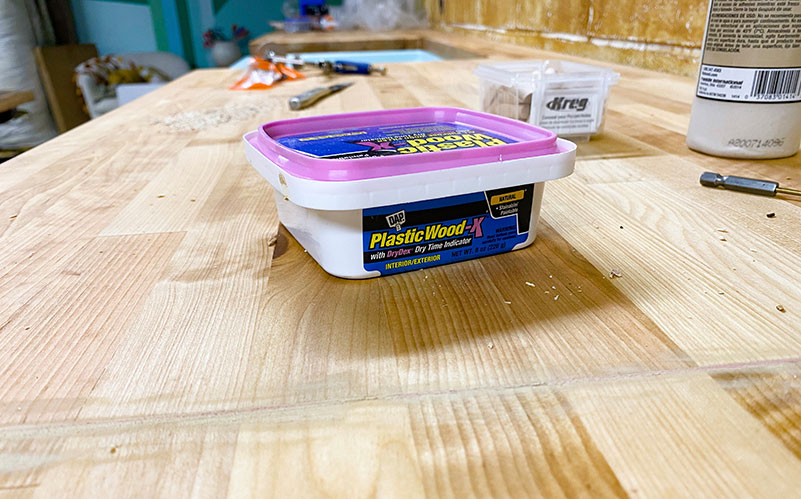
Once it’s dry, you’ll want to gently sand down these areas so you have a seamless finish.
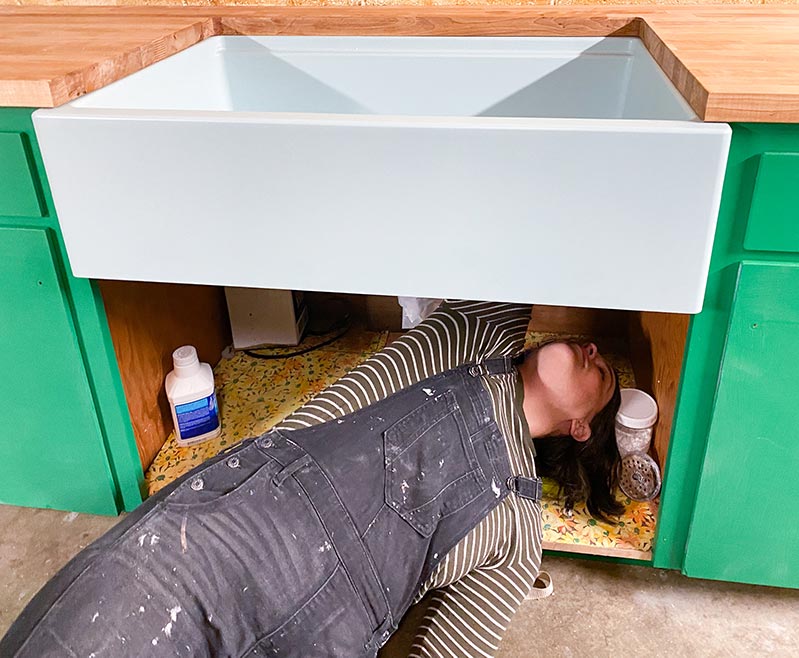
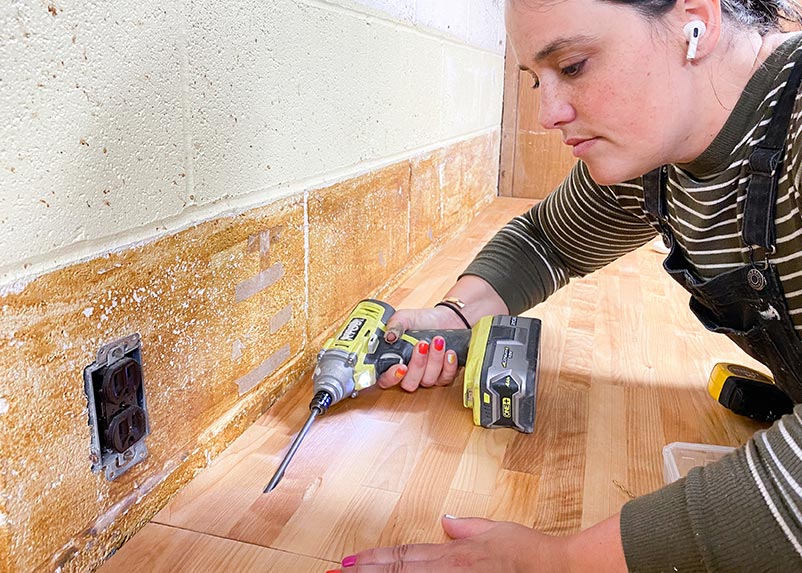
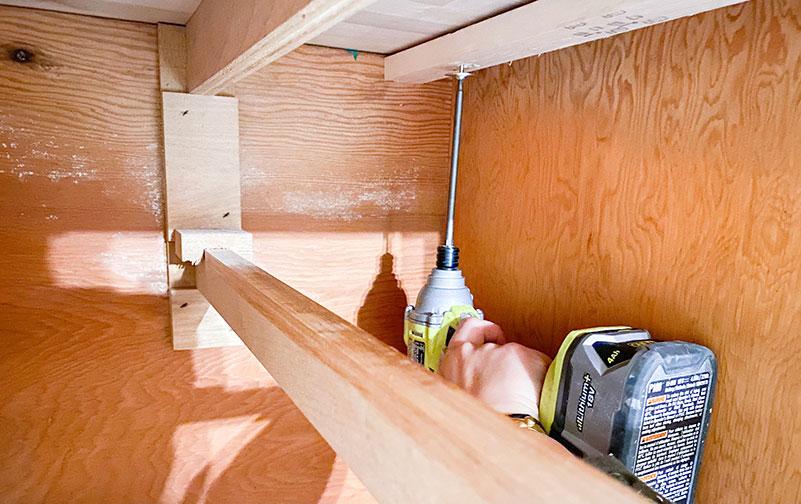
Secure to the Cabinet
Once that’s done, you’re ready to secure the countertops to the cabinet. I had to crawl down into the cabinetry with a drill.
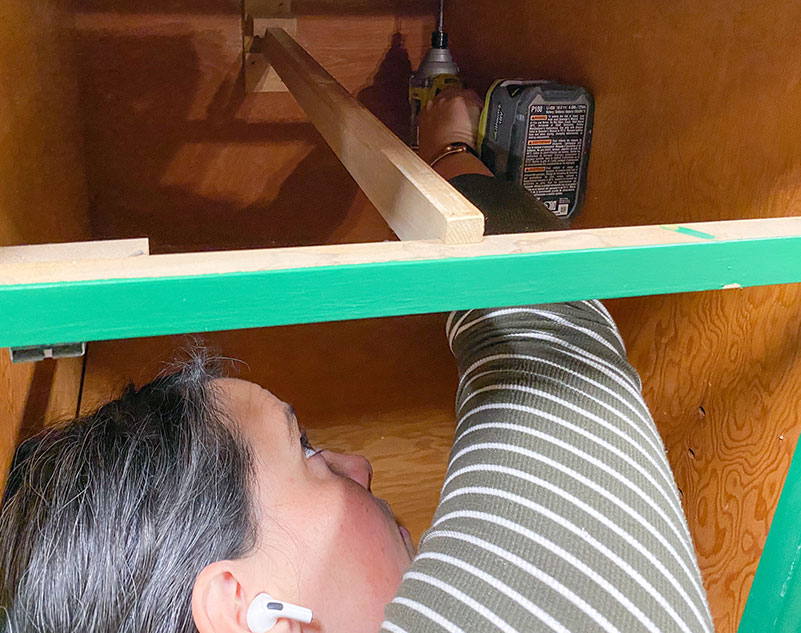
I also asked Garrett to jump up on top of the countertops to make sure they were fully-weighed down. I also needed to test his athletic ability. He fell several times. It was hard to watch. Poor guy. Eventually, he made it onto his perch so I could secure them.
And now folks, my countertops and sink are in place and are gorgeous!
What’s Next
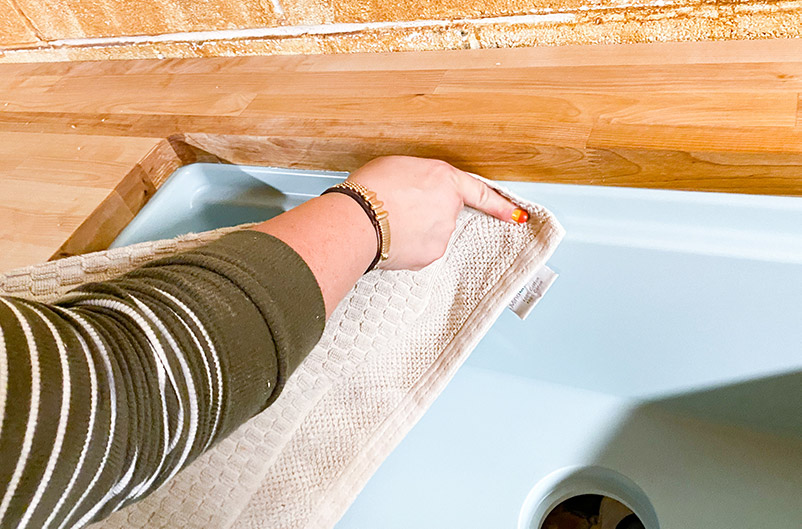
I’m going to talk more next week about the painted floor rug, but I’ll just let you in on this, I got started! Check out my Instagram stories to see my progress. As of right now, I’ve just finished my second coat of white floor paint and will be ready to do the darker checker color tomorrow!
Oh and we’re going to need to deal with the table. I have a lot of… feelings about the table. I’ll get into it next week after I talk to my therapist. I’m fine.
But I just need to stress to you and to myself, the hardest part is over. One time I was running a trail running Ragnar race with a team. I had run my three legs of the race and was pretty exhausted. One of our team members needed the team to pick up an extra leg—and I did it. I got up and I pushed through it even when I was tired. This feels a lot like that. Sometimes, you just need to go and get it done. It’s all downhill from here.
I’m so inspired by the other ORC creators and designers too! If you haven’t spent some time checking out their amazing creativity, I highly recommend taking the time to peruse their stunning work!
See More From the One Room Challenge Creators
I’ll hope you’ll join me and all the other incredible creators and designers that are part of the One Room Challenge!


Ariene C. Bethea | At Home With Ashley | Banyan Bridges | Bari J. Ackerman | Brit Arnesen
Brownstone Boys| Cass Makes Home | Dominique Gebru | Gray Space Interiors| Haneen’s Haven
Home Ec. | Nile Johnson Design | Pennies for a fortune | Prepford Wife | Rachel Moriarty Interiors
Sachi Lord | Susan Hill Interior Design | This Is Simplicite | Tiffany DeLangie | Victoria Lee Jones
Media BH&G | TM ORC

Garrett: I snorted several times. Well done. And we’ll done, Rachael!!
“See. Super important to drill holes around the perimeter and make sure they are secure or you’ll 100% get eaten by a dinosaur.“ is the best line in all blogverse history!
Loved this whole post! Can’t wait to see what you have in store for us next week
Adorbs..🤩
You rock! I’m loving this revamp so much!