Did you ever do Billy Blanks’ Tae Bo back in the day? Well, I sure did. Can’t you tell from my enormous muscles?
Throwing punches in my oversized t-shirt at a fuzzy TV screen back in the early aughts. Me, alone in my house knocking out invisible foes. Then, out of nowhere, he’d yell “Double time!” That’s when a profusely sweating Racheal had to make a decision—rise to the occasion or collapse on the floor.
I pushed through it.
This project has thrown me some curve balls, like the sink last week. I’ve tackled every obstacle thrown my way like a high school football player hyped up after hearing the band play Enter Sandman.
You’re going to start seeing me go double time from here until the end of the One Room Challenge. I did manage to swap out my sweaty over-sized t-shirt for a sweaty colorful jumpsuit though. You’re welcome.
Sitting Area Mural
Originally, when I designed this space, I pictured this area in the back corner of the kitchen as my office. I’m still going to use it as an office, but I had to re-evaluate the way I was considering it. My partner, Garrett, is very big on his office space. He sits there, chained to it like Marley’s ghost, and only gets up occasionally. The fool he is. He’s still trapped in a corporate business mindset and can’t even escape it.
Yet, I am liberated, free, and roaming. Where do I work? Everywhere. I’m sure my back is going to give out early, but it’s worth it to be stuffed into a corner of a couch with my feet thrown over the side. You’ll find my laptop popping out over the corner of furniture all over my house like a whack-a-mole. You can’t pin me down, man!
I envisioned a desk, but the more I looked at the space and the way I work, I decided instead to do two cute white chairs from Article. They are absolutely adorable and are perfect for dropping into and tackling a few emails or a mural design quickly.
I also have these bold, poppy colorful calendars that I use to keep track of my schedule. Why don’t I use a computer, bah! You mean so I could look at it anywhere at anytime? Absurd! I need to stand in front of a calendar like a dictator looking over a map of countries I’ve conquered or no deal.
So, two cute neutral chairs and three colorful calendars mounted up on the wall. My mural was going to need to compliment all of this and the newly painted green cabinets.
Design
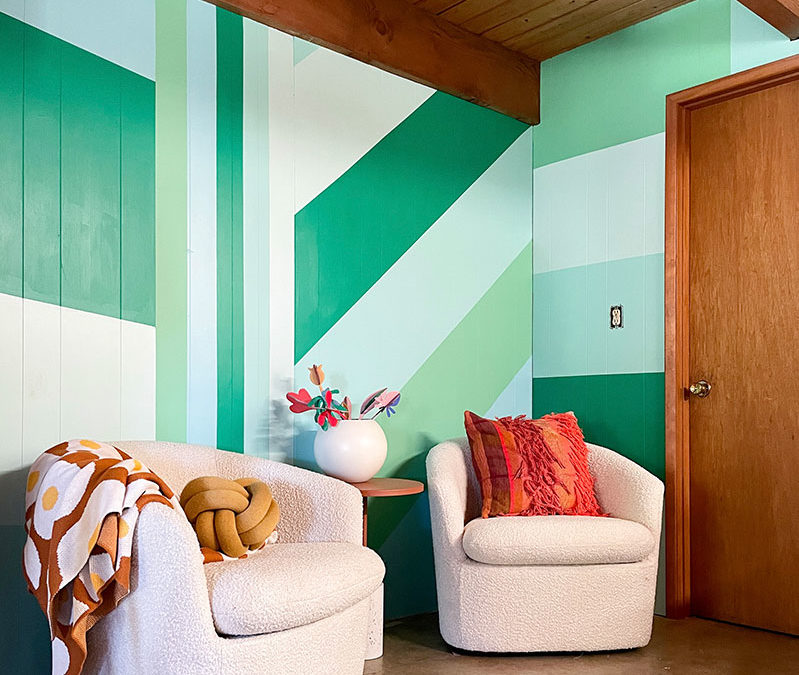
The design plays off of the mural on the opposite of the room otherwise known as the the barn mural. It’s just kind of an over-sized version of that design with a new palette. I loved this idea because it would help keep the room’s story cohesive and would be a great backdrop for the calendars.
Color Palette
Did you know I talk to myself often? My family frequently finds me in corners of the house mumbling to myself. They were concerned at first, but now they’re just happy I enjoy my own company. Good for me. I really struggled with the color palette for this. The Poketo calendars I have for the space are a variety of different colors that will change out every month. I wanted to use colors that were either complimentary or playful with the office mural and the green cabinetry, but I also had to make sure they wouldn’t fight any of the calendar colors that would pop-up.
I played with a few different colors, but then the greens and blues seemed like the best direction to take this. They’d all compliment the green cabinetry and help continue the story through the entire space.
Tape & Primer
As I mentioned the other day, Garrett taped off the area for me. He didn’t do a great job, but positivity and effort count for something. I joke, but I really did appreciate it.
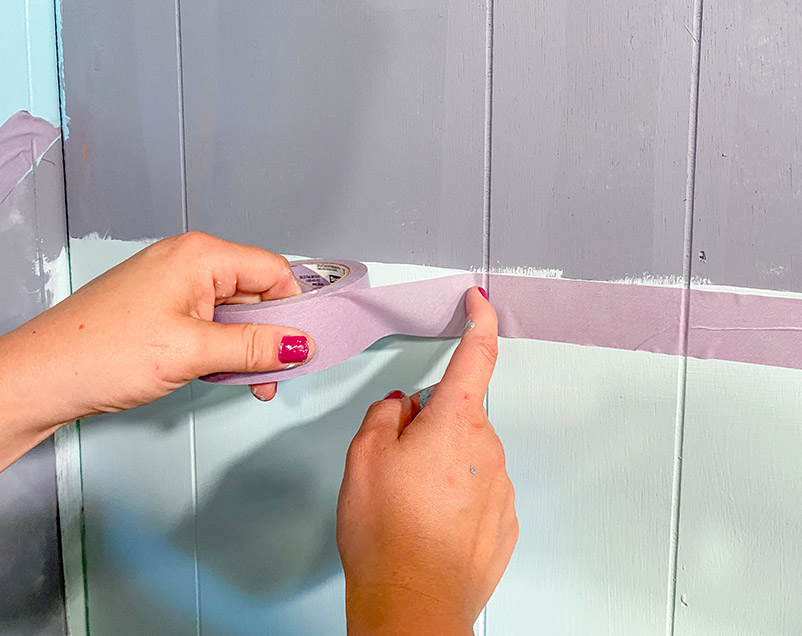
A couple of tips I gave to Garrett afterwards that can help you. It’s worth repositioning the tape however many times as you need so you have the tape right up against the edge. Shorter segments of tape also help you edge in the tape.
We then primed it until we had a nice coat across the entire surface.
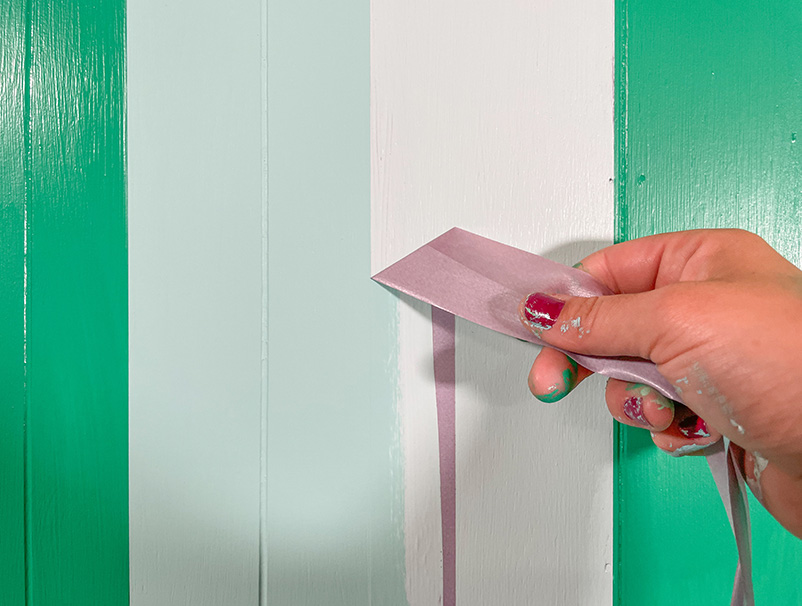
Painting
I taped off the design into the segments I wanted. An important warning about this stage of the mural, it’s always going to look terrible. For example, this mural looked like a bunch of rotting shark’s teeth drawn by a 3-year old. Too specific? Sorry, it’s what came to mind. But I mean, how do sharks keep their teeth clean? Kelp brushing? Tiny cleaning hygienist fish?
No way! I just Googled it. Shark teeth are covered in fluoride so they are completely cavity-resistant. Why don’t we have that super power?! And who thought that was okay to give sharks completely cavity-free super-sharp teeth! Bad idea.
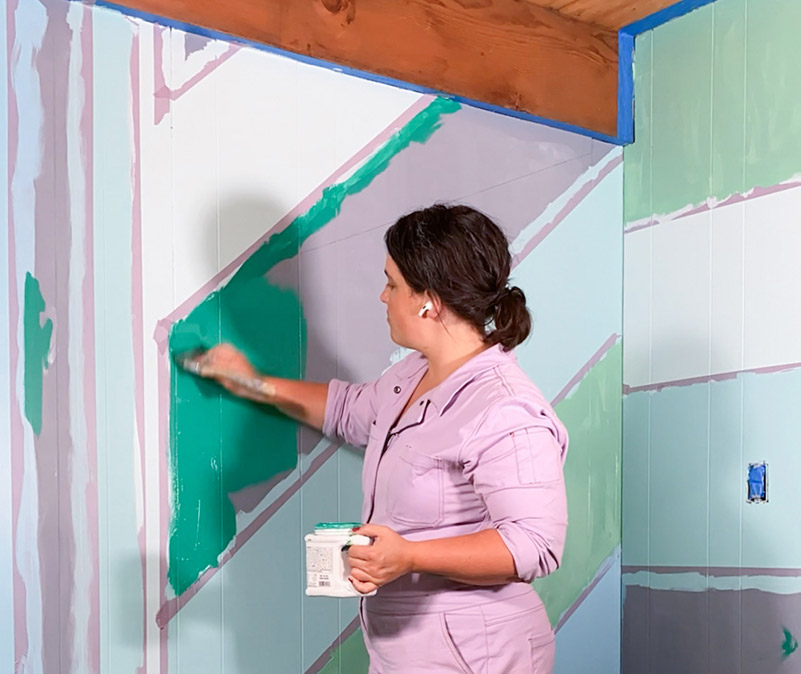
After the scary looking coats, you’ll start to get a better picture of the color palette after all the paint is on the wall. Until you pull that tape off though, just hang in there.
I love the way the mural turned out. After putting the chairs in the space, I was head-over-heels.
Future Planned Updates
You’ll notice that the calendar isn’t up yet. Why? Because as soon as I finished the mural, I realized that I might want to change a couple colors in the mural. The green colors look great, but there are one or two I want to switch out to different colors to give the mural some more variety. I may still get them up there for the final reveal, but I’m debating about whether I can fit it in.
But you’ll see. I’ve got a lot to cram in the next week and I am not going to make any guarantees on a small adjustment like that. It’s like telling my kid we’ll go to a park sometime. It will happen at some point, but I’m not going to overcommit. He keeps track and frankly, that’s terrifying.
Painted Floor Rug
Remember how I talked about this last week? I’m so excited to tell you all about this project. It has completely transformed the space.
Design
I worked on a lot of designs for this rug. Initially, I thought I’d do a checkerboard rug, but halfway through last week, I realized that I wanted to do checkerboard tile. I got the tile all worked out and ordered, but then had to reckon with the fact that the floor couldn’t be the same. I mean, I’m all for Wizard’s Chess but just like Ron, Hermione, and Harry found out, making the wrong move on checkerboards can end in disaster or temporary injury.
I went back to Illustrator and drafted a few more versions of the layout. I went to my Instagram account and asked followers about some ideas I had for the new direction. Many people and some designers recommended that I do something round or quite different so it didn’t compete with the tile. But I didn’t love that idea either.
Instead, I decided to keep squares and rectangular angles and shapes, but do something different enough that it wouldn’t be mistaken for an attempt at checkerboard.
Painting the Floor
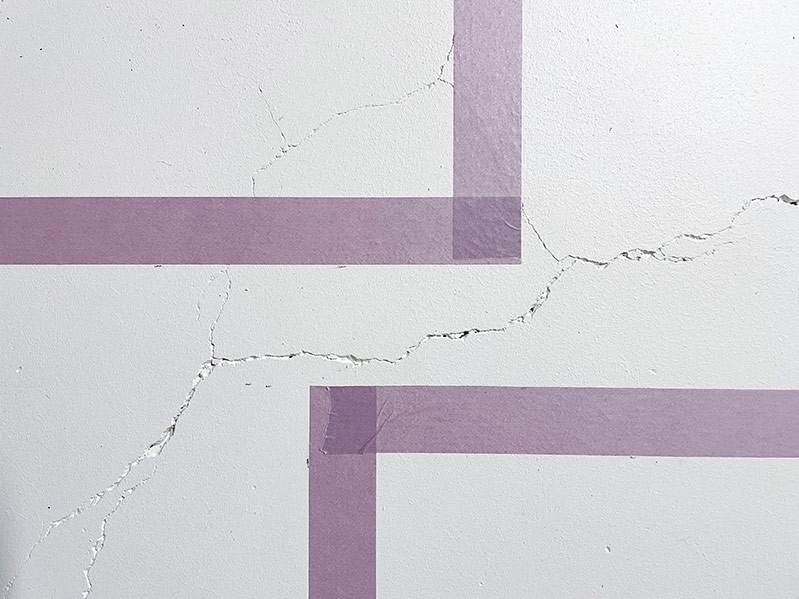
I taped off the area using Scotch painter’s tape Sharp Lines which helps make sure you get really clean lines. For floor paint, this tape makes a huge difference so you don’t end up accidentally peeling any paint off from your desired painted area.
Before you paint the floor, make sure. you scrub it clean. I can’t believe I’m saying this, because I never clean floors. Why? Because our kids have a part-time job of placing Cheerios neatly on every square inch of our floors.
After they were scrubbed, I got the paint prepared. I used Rust-Oleum Home floor paint. I poured the paint directly onto the surface which is now my favorite way to paint. It was so much fun. I felt like I was one of the mops from Fantasia with my bucket of paint and then I danced around the surface with a roller. Did you ever skip the very end of that movie when they did Night on Bald Mountain and the demon’s came out. Like, why did they want to traumatize an entire generation of children?
After the first coat goes down, you have to wait 6 hours before you can apply a second coat. Make sure you have barriers in place so that no one steps on the paint during that time. So I naturally, I killed my 6 hours by staring at the paint willing it to cure faster. It did not work. Weird.
While it was drying, I did just take in the fact that the space was instantly so much brighter. I never considered how much light the white painted rug was going to bring to the space. In this dark basement, it reflects the light so well and helps expand whatever light happens to make it in here.
No more black hole. We’ve got a supernova floor. And yes, I did instantly think about the song Supernova Girl from Zenon, Girl of the 21st Century. Zetus lapetus.
Final Coat
After the two coats were dry and I spent 6 hours watching Marvel movies instead of watching the paint dry, I was ready for the final coat. I painted on the dark gray squares. I got the paint applied and let it start drying.
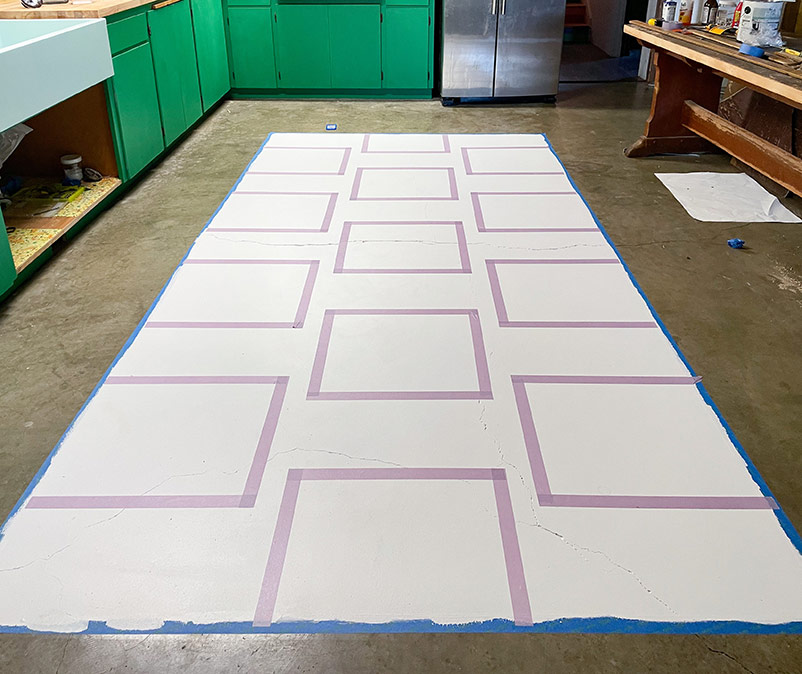
The final version is spectacular! It’s sophisticated and won’t compete with the tile. I’m so excited that this painted floor rug has added new life the space.
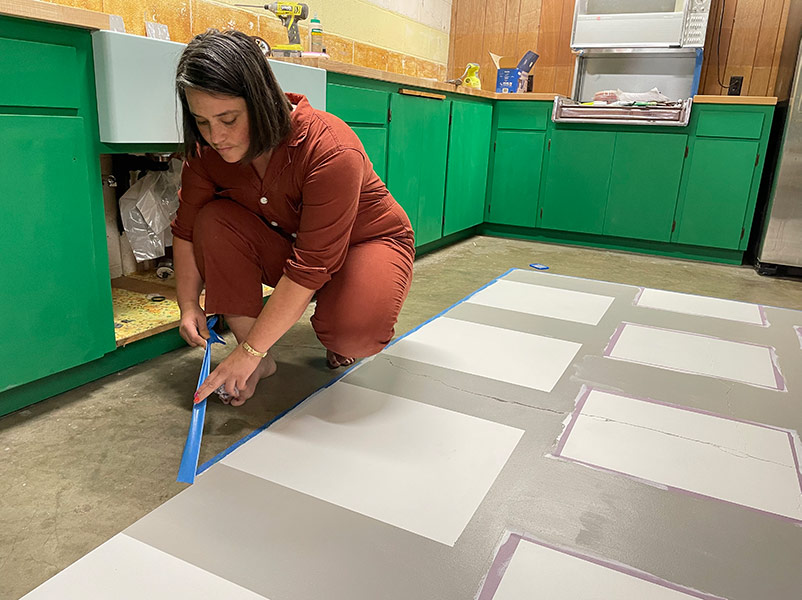
One quick side note, don’t put anything on the paint for a week. Hold off on furniture or things like that until it’s had enough time to fully cure. It just needs some space. Y’know. Let it have some time to find itself and then it will have space for furniture in its life and all its baggage.
Delays & Crunch
I can’t really take a second to catch my breath, team. Give me some quick cheers because we are right onto the next project. Unfortunately, the faucet I was expecting for the space got delayed in transit so I’m having to explore a plan B. I also had to take some extra time to get the table glue tested for asbestos. Good news! It’s asbestos free! Yay not dying!
So in traditional Banyan Bridges One Room Challenge fashion, I am going to be conquering a buttload of projects my last week:
- Strip and stain table
- Tile the kitchen
- Hang artwork
- Install faucet
- Install lighting
You know, because where’s the fun in evenly spacing this stuff out over the course of 8 weeks like my sane colleagues below?
See More From the One Room Challenge Creators
I’ll hope you’ll join me and all the other incredible creators and designers that are part of the One Room Challenge!


Ariene C. Bethea | At Home With Ashley | Banyan Bridges | Bari J. Ackerman | Brit Arnesen
Brownstone Boys| Cass Makes Home | Dominique Gebru | Gray Space Interiors| Haneen’s Haven
Home Ec. | Nile Johnson Design | Pennies for a fortune | Prepford Wife | Rachel Moriarty Interiors
Sachi Lord | Susan Hill Interior Design | This Is Simplicite | Tiffany DeLangie | Victoria Lee Jones
Media BH&G | TM ORC



You amaze me! Is there anything you can’t do? I really enjoy following your work. Bravo!
You’re amazing and inspiring!
Tae Bo 😂😂 100% yes, from a VHS tape. I LOVE THIS ROOM!! What would you think about adding mural paint colors at the end of posts??? Thanks! Xo