
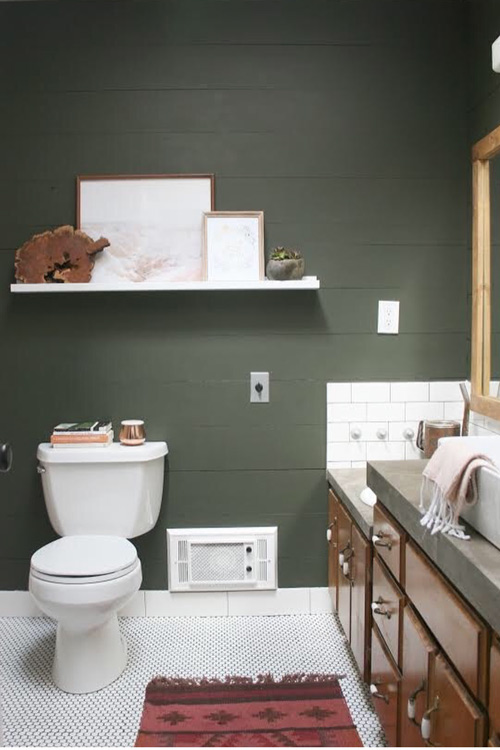
You’ve had one of those days. You wake up and try on an outfit—then another. You keep going until the stack of clothes on your floor is reaching waist-height. That’s exactly how I’ve approached this bathroom. This room has had so many iterations. 60’s original, 80’s remodel, farmhouse, modern farmhouse—you name it, I’ve tried it.
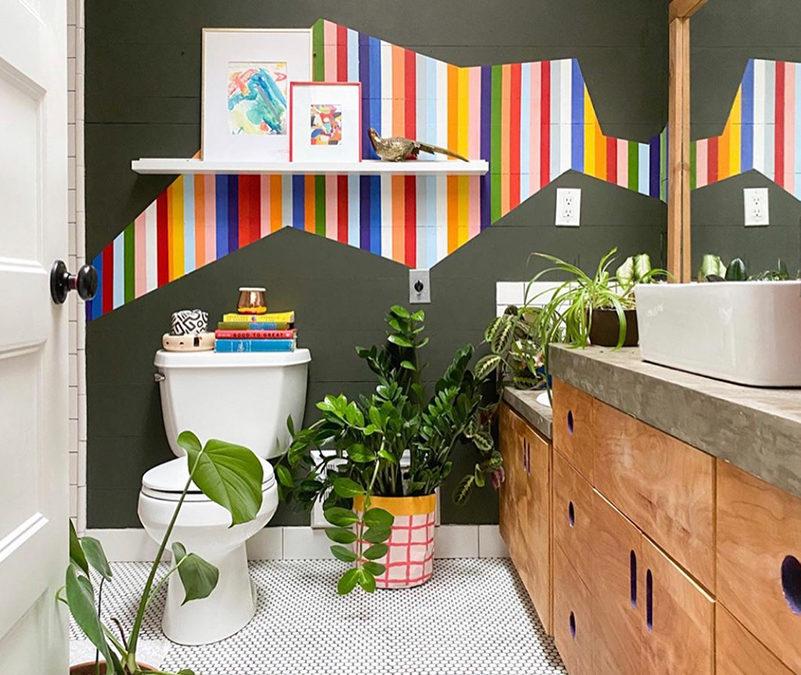
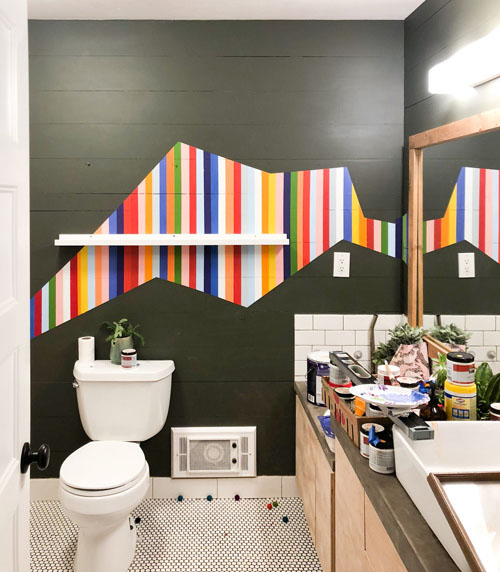
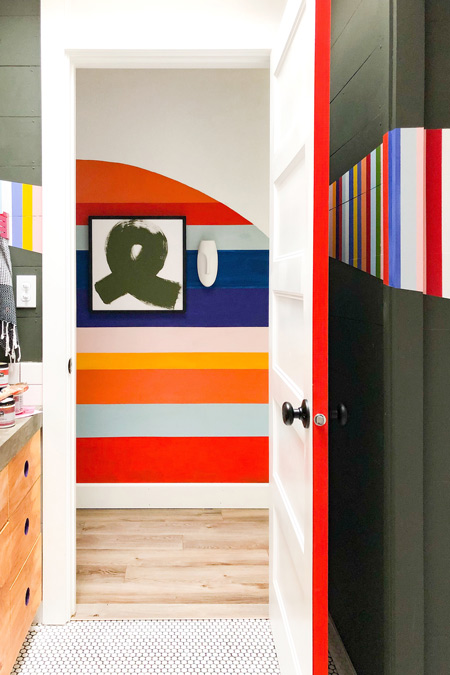
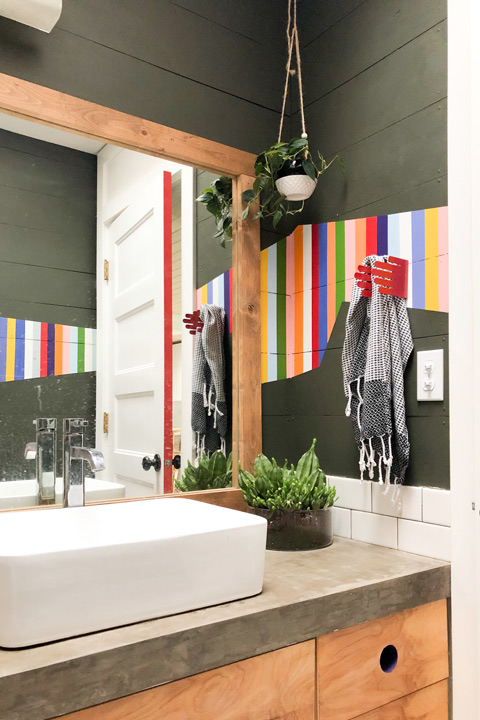
And now, the final version: bright colorful streams of color. I couldn’t be happier.
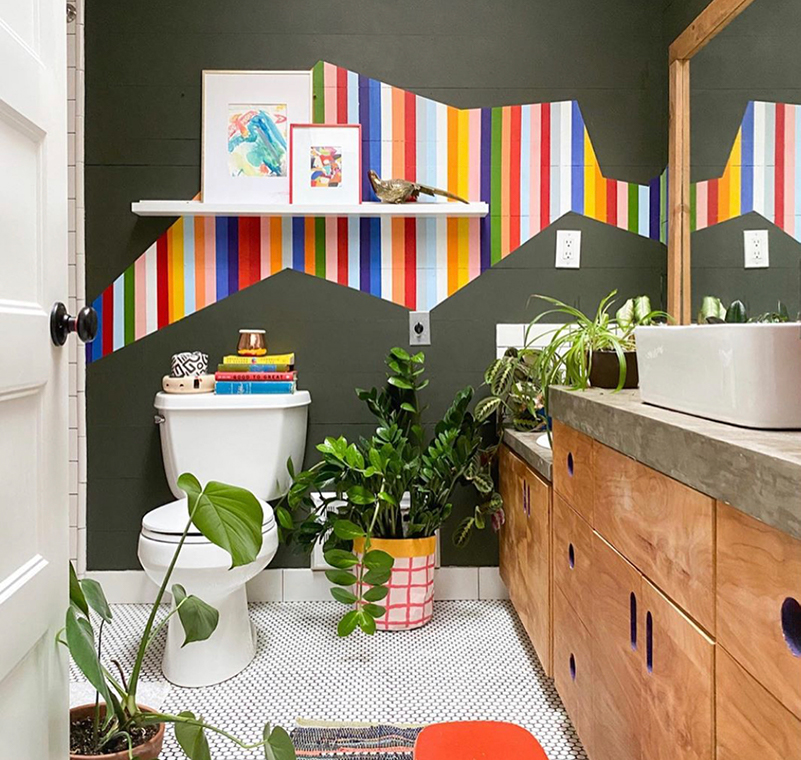
Seriously, seeing the before and after of this project gets me pumped up to do it all! COLOR ALL THE WALLS!!! STRIPE THE SHELF!!! And maybe buy some more masking tape cause I’m all out!
Supplies
- Masking tape
- Paintbrush
- Pencil
- Level or yardstick
- Paint in 7+ colors
Painting Stripes on Your Wall
I talk to lots of people who want to do something like this in their home, but are worried they can’t pull it off or that the process will be too difficult. I’m here to tell you that YOU CAN DO IT!
First things first—you’ve got to read this post on how to paint a clean line. Once you have that covered, there is no wall you can’t stripe!
Shaping Paint Stripes on a Wall
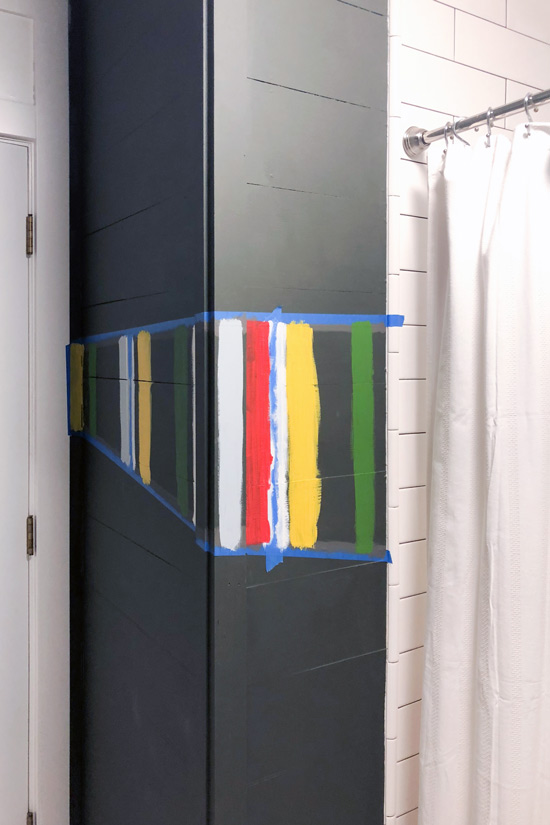
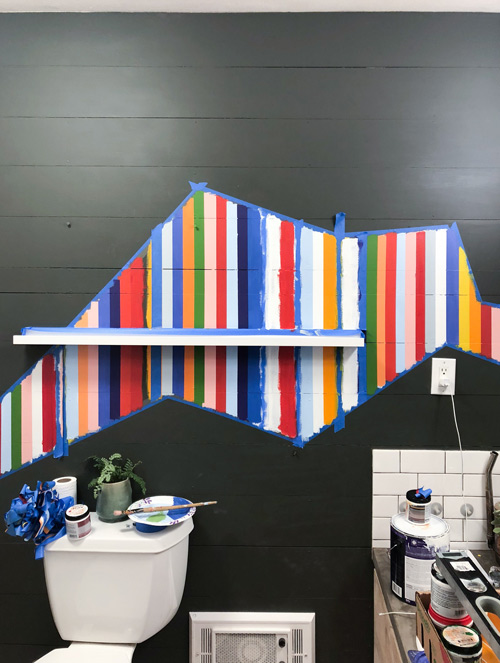
Now that you’ve got that mastered, let’s talk shape. If you are going to do an uneven pattern as I did, you need to tape it out first. This will probably take a little trial and error. Place the tape for the top of the zig-zag and the bottom. Once it’s decided, paint along the interior with your base wall color (in this case, you’ll see that I used a brown color that was similar to my dark green color because I had run out of green paint).
You now need to mark your tape with pencil the width you’d like each stripe to be. I chose to do my stripes the width of my roll of tape, which I’ve found to be easiest (this way you can tape off both edges of the stripe with only one piece of tape). This also makes marking easier, as you can use the roll as your measure between marks. One thing to remember is that you are going to need to keep your marks the same width horizontally, no matter the angle of the tape. This just means that you need to keep your roll of tape (aka, measurer) vertical as you move it around the tape on the wall.
Use a level or a yardstick or a straight piece of scrap lumber or a book edge or something straight to connect the lines along the the top and bottom strip of tape (a level is really useful here just so you only have to mark ticks on one level of tape). I marked these lines lightly in pencil. They’re just basic guides so you can paint some stripes without them going wonky all over the place.

Now you are ready to paint some stripes! Lets talk consecutive stripes. My first time painting stripes of different colors was the rainbow wall, and I learned a thing or two. Rather than taping off every stripe that you do, its more efficient to tape off every other one, as you see in the photo. Be sure to paint over the penciled on lines.
When I started this process, I did not have a plan for how I wanted these stripes to go. So get your color palette, and start playing around. Don’t overthink it—just know you can always paint over a color if it doesn’t jive well with the ones next to it.
After you’ve painted a stripe on and the paint has dried, lay a piece of tape over the top of it. It should match up with the markings you made earlier on the masking tape. If it goes a little wider or narrower than your markings, don’t worry about it. Mine did too in a few places and you don’t notice. Paint over the edges of this piece of tape with the color you just covered. Let this dry and then paint the stripe next door!
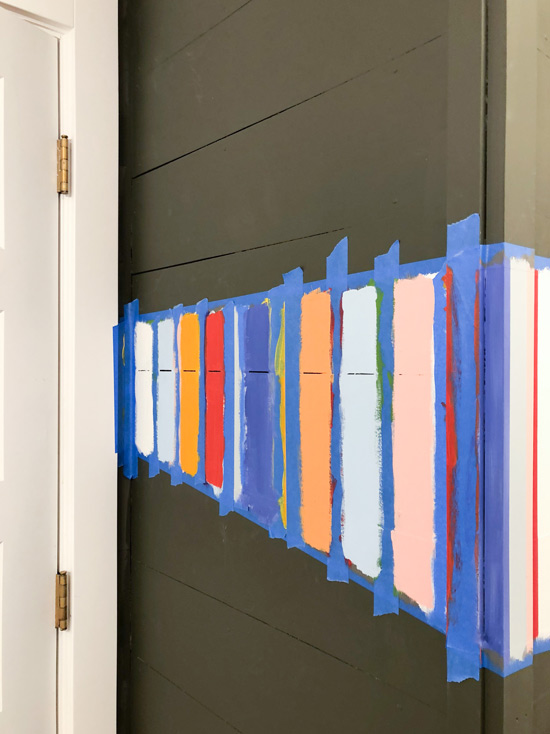
The beauty of painting every-other stripe is that after taping over them, you don’t have to do any extra work for the stripes in between! You just paint between the tape and once you peel it off, you get gorgeous clean lines.
Repeat, repeat, repeat. Don’t panic. Even when you have a ton of masking tape on the wall and the colors don’t feel quite right and you think, “what am I doing? I don’t even remember the base color I used in case this doesn’t work out and I want to cover it all!!!!”. You will be fine. You will tweak the colors. You will mix some with white so they don’t look as harsh or awkward on your hunter green background. And when you FINALLY remove the tape, you will smile at the stupidly beautiful carnival you’ve created. And all will be right with the world.


I was so excited to find your murals, and especially your kind instructions to the rest of us without much talent or experience! I’ve seen so many artists here painting blobs, or scalloped blobby decoration around a door. So many! Yours are beautiful, much more original, and are not “on trend” (in the worst meaning of the phrase).
Keep painting! Keep photographing! We are following you and aspiring to create some stripes or knots!