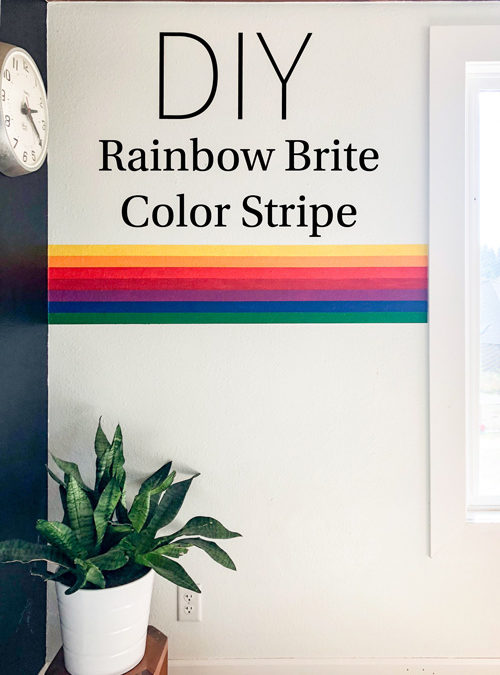
I found this bed sheet whilst I was out thrifting last month and fell immediately in love. I bought it, not knowing what I was going to do with it. It was $5. Months later, inspiration struck and the rainbow wall was born.

I started by pulling all the color samples I have collected over the years from random projects and painted a piece of paper to test. Can you believe I had all these colors ALREADY? And they’re perfect! Well, almost perfect. That light yellow was some acrylic paint from 8 years ago that kinda smelled like mildew and was suuuper runny. The smell faded after a day or so, so it’s all good.
The colors I used are (in RoyGBiv order): Red geranium by Glidden, Top Tomato by Behr, Blazing Bonfire by Behr, Yellow (as in the color yellow in craft paint), Grasslands by Behr, Sapphire Sparkle by Behr and Dynamic Magenta by Behr.

The important details I had to get right were making sure the rainbow was level, and the lines were clean. I used my 4 ft level and used this handy trick for getting clean lines:

Its so simple. You make sure you press the tape as firmly to the wall as possible, and then paint over the edge of the tape with the base wall color (or whatever color is going to be on the other side of the stripe). This way, the wall color leaks under the tape and creates a seal, so whatever color is painted over top follows the clean tape line. This process is tedious and can be time intensive, but it’s worth it for the clean, professional line.

Paint alternating stripes, allow them to dry, and then move the tape to the top of what you just finished. Paint over the edge of the tape with the color you just covered, and then paint the blank slots with the next color.


I forgot to take a picture of the stripes filled in, but here’s a quick video to help you visualize the finish.
This project changed the way this room feels. It’s such a small section of the wall that was painted, but packs a serious punch! Check out my Instagram account to see the other angles of it!
View this post on Instagram


